
©Sassy n Simple Date
HALLOWS EVE
Written: Oct 10, 2010
THINGS YOU NEED
It is your responsibility to have or get the programs that are needed.
Paintshop or Corel Program
ANIMATION SHOP
PLUGIN: Eye Candy 5 Impact Gradient Glow demo HERE
You will need a good working knowledge of the program.
TUBE: Crystalex is PTU you can get it at MPT
I have a license for this tube
KIT: Designs by Stina PTU you can get it at TKO
FONT: Of your choice I used DaFonts LunacyMore HERE
MASK: Weescotslass Mask_287 HERE included in supplies
My Supplies HERE
READ BELOW BEFORE STARTING
Settings may differ slightly depending on your version.
Close original after you copy it unless I state otherwise.
Sharpen all re-sized items 1 time.
RE-SIZE only one layer unless other wise stated.
Refer to my image for placement of items.
Left click and right click refers to mouse buttons.
Now Lets Start
1. Open a new transparent Image 500x500
Flood fill with a light gray
This is your working image
2. Layers palette/right click/add a new raster layer
Selections/Select all
Select paper 14 from the kit Edit/copy
Edit/paste into selection into your working image
Selections/select none
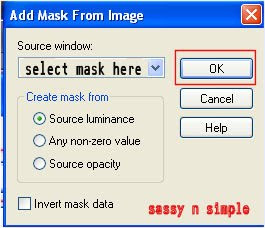
3. Layers/new mask/from image (settings below)
Select WSL_mask287 in the window
click OK
 4. Layers palette/right click black/white mask Delete
Would you like this mask merged into layer below YES
Layers palette/right click top mask/ merge/merge group
5. Select the Graveyardghost01 from kit Edit/copy
Edit/paste as new layer into working image
Re-size it 50% Move to left side of mask
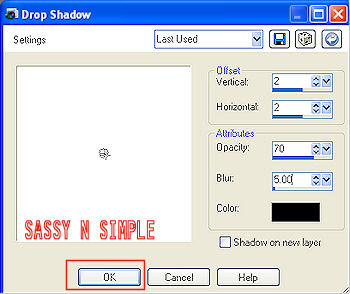
6. Effects/3D/drop shadow (settings below)
7. Select the GrimReaper from the kit Edit/copy
Edit/paste as new layer into working image
Re-size it 50%
Apply same drop shadow
Move to the top slightly to the right
8. Select Tree 01 from the kit Edit/copy
Edit/paste as new layer into working image
Re-size it 50%
Move to top of right side of mask It is OK if some goes off the mask
Apply same drop shadow.
9. Select the Gate 01 from kit Edit/copy
Edit/paste as new layer into your working image
Re-size it 80%
Apply same drop shadow
Move to bottom of mask center it
10. Select your tube Edit/copy
Edit/paste as new layer into working image
Re-size as needed I re-sized 80%
Apply same drop shadow
Move slightly to the left at bottom of mask
11. Select the Skulls from the kit Edit/copy
Edit/paste as new layer into your working image
Re-size 20%
Apply same drop shadow
Move to right bottom side of image
12. Select the Evil pumpkin from the kit Edit/copy
Edit/paste as new layer into your working image
Re-size 20%
Apply same drop shadow
Move to right side next to skulls
13. . Select the Blackcat 01 from the kit Edit/copy
Edit/paste as new layer into your working image
Re-size 20%
Apply same drop shadow
Move to the left side bottom by gate hedge
14. Select a color in your foreground I used #3bf01c
Layers palette/right click/add a new raster layer
Select the brush I made under your brushes
Apply it by clicking left mouse button..
15. Effects/Eye Candy 5 Impact Gradient Glow
First under settings tab select factory default
( all other settings Below)
Click OK
Layers palette take opacity down 66 or your likening

HALLOWS EVE
Written: Oct 10, 2010
THINGS YOU NEED
It is your responsibility to have or get the programs that are needed.
Paintshop or Corel Program
ANIMATION SHOP
PLUGIN: Eye Candy 5 Impact Gradient Glow demo HERE
You will need a good working knowledge of the program.
TUBE: Crystalex is PTU you can get it at MPT
I have a license for this tube
KIT: Designs by Stina PTU you can get it at TKO
FONT: Of your choice I used DaFonts LunacyMore HERE
MASK: Weescotslass Mask_287 HERE included in supplies
My Supplies HERE
READ BELOW BEFORE STARTING
Settings may differ slightly depending on your version.
Close original after you copy it unless I state otherwise.
Sharpen all re-sized items 1 time.
RE-SIZE only one layer unless other wise stated.
Refer to my image for placement of items.
Left click and right click refers to mouse buttons.
Now Lets Start
1. Open a new transparent Image 500x500
Flood fill with a light gray
This is your working image
2. Layers palette/right click/add a new raster layer
Selections/Select all
Select paper 14 from the kit Edit/copy
Edit/paste into selection into your working image
Selections/select none
3. Layers/new mask/from image (settings below)
Select WSL_mask287 in the window
click OK
 4. Layers palette/right click black/white mask Delete
Would you like this mask merged into layer below YES
Layers palette/right click top mask/ merge/merge group
5. Select the Graveyardghost01 from kit Edit/copy
Edit/paste as new layer into working image
Re-size it 50% Move to left side of mask
6. Effects/3D/drop shadow (settings below)

7. Select the GrimReaper from the kit Edit/copy
Edit/paste as new layer into working image
Re-size it 50%
Apply same drop shadow
Move to the top slightly to the right
8. Select Tree 01 from the kit Edit/copy
Edit/paste as new layer into working image
Re-size it 50%
Move to top of right side of mask It is OK if some goes off the mask
Apply same drop shadow.
9. Select the Gate 01 from kit Edit/copy
Edit/paste as new layer into your working image
Re-size it 80%
Apply same drop shadow
Move to bottom of mask center it
10. Select your tube Edit/copy
Edit/paste as new layer into working image
Re-size as needed I re-sized 80%
Apply same drop shadow
Move slightly to the left at bottom of mask
11. Select the Skulls from the kit Edit/copy
Edit/paste as new layer into your working image
Re-size 20%
Apply same drop shadow
Move to right bottom side of image
12. Select the Evil pumpkin from the kit Edit/copy
Edit/paste as new layer into your working image
Re-size 20%
Apply same drop shadow
Move to right side next to skulls
13. . Select the Blackcat 01 from the kit Edit/copy
Edit/paste as new layer into your working image
Re-size 20%
Apply same drop shadow
Move to the left side bottom by gate hedge
14. Select a color in your foreground I used #3bf01c
Layers palette/right click/add a new raster layer
Select the brush I made under your brushes
Apply it by clicking left mouse button..
15. Effects/Eye Candy 5 Impact Gradient Glow
First under settings tab select factory default
( all other settings Below)
Click OK
Layers palette take opacity down 66 or your likening
16. At this time go ahead add copyrights and watermark
Add your name also at this time
17. Layers palette/right click /merge/merge visible
18. Select the SNS_Rope from my supplies
Edit/copy
Edit/paste as new layer into working image
No re-size
Move it to the right so top looks like It is on the tree branch
18. Select the Skeleton O2 from the kit Edit/copy
Edit/paste as new layer into working image
Re-size it 50%
Move it over so that it lined up with the rope
19. Still on skeleton
Layers palette/right click/duplicate 2 times
Close off the top duplicate by clicking eye in layers palette
20. Select copy of raster 2 Layer click on skeleton with mouse
Click on your mover tool click back on skeleton
Now use keyboard move arrows buttons
Use the up arrow move skeleton up so feet
Near the pumpkins eye
Close this layer by clicking eye in layers palette
21. Open copy 2 of raster 2 skeleton
Repeat step 20 for the top skeleton layer
The head should be near the reapers blade
Close this layer by clicking the eye
22. Top and middle skeleton layers should be closed off
Continue to Animation part
or save in jpeg as it is if you do not want to animate it
ANIMATION
Open your animation shop
1. In PsP Edit/copy/merged
Take it to animation shop
Edit Paste as new animation by right clicking in work space
2. Back in PSP close off the bottom raster 2 skeleton
Open copy 2 of skeleton (middle one)
Edit/copy
3. Take it to animation shop
Right click first frame/paste/paste after current frame
4. Back in PSP close off the raster 2 (middle layer)
Open the Top copy 2 of raster 2 Layer
Edit/copy
5. Take it to animation shop
Right click second frame/paste/paste after current frame
6. Edit/select all
Right click first frame change display time to 35 or 40
I used 35
7. File Open
Select the SNS_HE fire from my supplies
Edit/select all
Drag this into your bigger animation
Making sure to place in tubes hands
See step 9 if you mess up placement
8. File Open
Select the SNS_PumpkinFame from my supplies
Edit/select all
Drag this into image place it in the pumpkins mouth
See step 9 if you mess up placement
9. Should you mess up go to edit undo drag
Go back to the fire/flame animation box Edit/undo drag
And try again.
10. Save your animation now.
Thanks for trying my tutorial I hope you enjoyed it.
Please if you use it to make a stat apply below credit in your footer
Tutorial by: ©Sassy n Simple
HERE or HERE
You can copy and paste the above but if does not work links below
http://www.sassynsimple.com/
And to here http://groups.yahoo.com/group/sassynsimple/
©Sassy n Simple