
©SassynSimple Tutorials
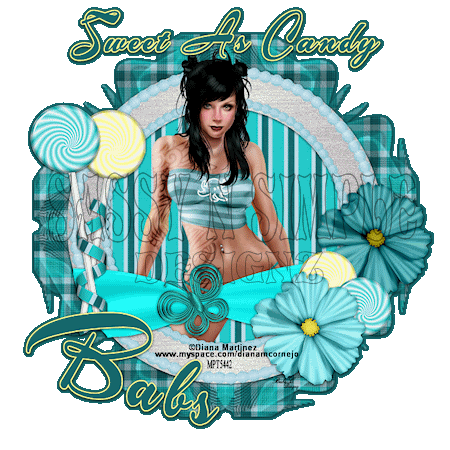
SWEET AS CANDY
SWEET AS CANDY
DATE WRITTEN: Oct 9, 2009
PROGRAMS NEEDED
PAINTSHOP PRO X2
Animation Shop
You must have a good working knowledge of the programs I use.
ITEMS NEEDED
TUBE: Diana Martinez must buy it at MY PSP TUBES
Mask Essex Girl Frilly sinedots 2 . Mask HERE ( it is included in my supplies)
MY SUPPLIES: HERE
If you choose a kit re-sizing may change.
Let's Begin
First Please note that I will not repeat the following steps.
We will use same drop shadow unless I state otherwise.
Always Close original image after you copy unless stated otherwise.
Always sharpen re-sized items one time.
1. Open your tube and the mask from my supplies minimize for now.
2. Open a new transparent image 700X700 Do not fill the layer, We will do something with it later.
3. Add a New Raster Layer, Selections/select all.
Select paper 1 from My Supplies Edit/copy,
Edit/paste into selection.
Selections/select none.
4.Toolbar/layers New Mask Layer/from Image Select the mask
in the window. source luminance/checked Invert mask data/checked
5. In your layers palette do the following
Right click black/white mask layer Delete/click yes
next window that pops up select yes
Right click mask layer Merge/merge group.
6. Layers palette/right click/mask Layer/Duplicate it 1 time.
Right Click/ duplicated copy/merge/merge down.
Now re-size your merged mask Layer 85%.
Apply drop shadow settings below.
Vertical and Horizontal 2
Opacity 70
Blur 5.00
Color Black
7. Select Frame 1 from My supplies. Edit/copy,
Edit/paste as new layer into your image.
Re-size it 80%.
Apply Drop shadow
Select magic wand/click inside the frame window.
Selections/expand 12.
Keep Selected.
8. Layers palette/right click layer below frame/add new raster layer
Select Paper 3 from my supplies. Edit/copy,
Edit/paste into selection.
Selections/select none.
9. Select your Tube Edit/copy,
Edit/paste as new layer into your image. Below your Frame..
Re-size if needed.
layers palette/right click/Duplicate your Tube 1 time
Right click on Duplicate Arrange Bring it to top.
With your eraser tool erase and parts that is covering the bottom of your frame.
10. Click back on your Tube layer that is below your frame. Apply drop shadow.
11. Select the butterfly wrap from my supplies edit/Copy
edit/paste into your image.
Re-size it 60%.
Use your warp Tool and push the wrap in around the frame.
Once you are happy with the way it looks.
Apply drop shadow.
12. Select flower 1 from my supplies edit/copy
Edit/paste as new layer into your image.
Re-size 40%.
Apply same drop shadow.
Arrange on the bottom right side of frame. Refer to my image.
13. Select flower 2 from my supplies edit/copy
Edit/paste as new layer into your image.
Re-size 40%.
Apply same drop shadow.
Arrange on the bottom right side of frame.
Refer to my image.
14. Select Candy 1 from my supplies edit/copy
Edit/paste as new layer into your image. In between your flower layers
Re-size 30%,
Apply drop shadow.
Arrange between your flowers. Refer to my image
15. Select Candy 2 from my supplies edit/copy
Edit/paste as new layer into your image. In between your flower layers
Re-size 30%,
Apply drop shadow.
Arrange between your flowers. Refer to my image.
16. Select Lollipop 1 from my supplies edit/copy
Edit/paste as new layer into your image.
Re-size it 50%,
Image/free rotate 10.00 right uncheck the boxes at bottom.
Move to the left side of your frame. Refer to my image
17. Select Lollipop 2 from my supplies edit/copy
Edit/paste as new layer into your image.
Re-size it 50%, Image/free rotate 10.00 left.
make sure the boxes are still unchecked
Move to the left side of your frame. Refer to my image
18. Select ribbon 2 from my supplies edit/copy
Edit/paste as new layer into your image.
Re-size it 70%. Move over on top of your lollipops.
Using your free hand too.. Settings below.
Draw our some parts of the ribbon refer to my image.
Free hand settings
Selection type Point to point
Mode add/shift
Feather 0
Smoothness 0
Anti-alias checked.
Save your image
19. Select a color from your image in Both the foreground and background colors.
Select your text tool (settings below) and type our Your text.
Use the nodes to adjust the size of you text till you are happy with it.
layers palette.right click the text layer/convert to raster layer.

20. Still on text layer to the following Under your Selections
A. select all,
B. select float.
C. Select defloat.
D modify expand 2
Now add a new raster layer under the text layer.
Select a color that will stand out from your image In your foreground color and flood fill
Selections/select none.
21. Now apply your watermarks and copy rights. Try to place them like I did mine. Refer to my imageh
22. Layers palette/click the eye close the Bottom empty layer and
layers palette/right click/merge/Merge Visible.
Under your Selections do these steps..
A. select all,
B. select float.
C. Select defloat.
D modify expand 4.
Select a dark color from you image in your foreground color
Open back up the closed layer make sure to select it. Now flood fill the selection. Selections/select none.
23. Re-size your Image all layers I make my tags 400x400
Edit/copy merged.
FOR TRANSPARENT BACKGROUND
Using Animation Shop
24. Edit/copy copy/merged
Take it Animation Shop
right clicking anywhere in workspace paste as new animation
25. Now To Save your Animation
If you use my tutorials in a stat place credit below in your footer
Tutorial By. BabsC
HERE or HERE
Copy and paste credit or use links below
http://groups.yahoo.com/group/sassynsimple/
http://sassynsimple.blogspot.com/
I want to thank the Members of SassynSimple Group for testing the Tutorial
I always appreciate their help in making the tutorials mistake free.
©SassynSimple Tutorials