Showing posts with label ISAMEL RAC. Show all posts

Wednesday, May 23, 2012

NATURAL LADY

©SassynSimple Tutorials

NATURAL LADY
Date Written:  May 23, 2012

PROGRAMS YOU NEED
You are responsible for finding things you need to do this tutorial.
You will need a good working knowledge of the programs I use.
Paintshop or Corel Program 

ITEMS YOU NEED
 Thank all Of you whose items I used to make this tag.
I do appreciate the use of them.

TUBE: Of your Choice I used the artwork of Ismael Rac
You must purchase it HERE I have a license for this tube
KIT: Lilas FTU Natural Here
MASK: Of your choice or  My Bitzy Beez Designz BBD_2012 Mask 156
(Scroll to bottom of tutorial to get my mask)

FONT: Of your choice

READ BELOW BEFORE STARTING
Settings may differ slightly depending on program you use I use x2
Close original after you copy it unless I state otherwise.
RE-SIZE only one layer and sharpen once if needed
Left click and right click refers to mouse buttons.
Refer to my image for placement of items.

Now Lets Start

1.  Select your Tube and mask minimize them for now

2. Open a new  600x550 transparent image
Selections/select all
Select Paper 3 from the kit
Re-size it 25% edit/copy
Edit/paste into selection on you image
Selections/select none
** when closing  original paper do not save changes

3.  Layers/new mask layer/from Image
Select BBD_2012 Mask 156 in the window
(see other settings below)
Click Ok


4. Layers palette/right click mask/merge/merge group

5. Effect/3D/Drop Shadow
(see settings below)
Click OK


6.  Select element 9 (petals)from the kit edit/copy
Edit/paste as new layer into your image
Re-size 15%
Image free rotate 30.00 right boxes not checked
Apply same drop shadow
Move to left side of mask 

7.  Select element 8 (frame) from the kit edit/copy
Edit/paste as new layer into your image
Re-size 25%
Apply same drop shadow
Move to right side of mask keeping it centered

8.  Select Your tube edit/copy
Edit/paste as new layer into your image
Re-size as needed, I re-sized mine 85%
Apply same drop shadow
Center it in the frame window

9.  Select element 4 (leaves) from the kit edit/copy
Edit/paste as new layer into your image
Re-size 20%
Apply same drop shadow
Move to bottom left side of frame

10.  Select element 14 (white flower) from the kit edit/copy
Edit/paste as new layer into your image
Re-size 25 %
Apply same drop shadow
Move to  bottom of frame to the right of leaves

11. Select element 5 (brown flower) from the kit edit/copy
Edit/paste as new layer into your image
Re-size 25 %
Apply same drop shadow
Move to bottom of frame place on left side of other flower

12.  Select element 12 (leaves) from the kit edit/copy
Edit/paste as new layer into your image
Re-size 15% then again 85%
Image free rotate 90.00 right
Apply same drop shadow
Move to  right side of frame

13. Select element 10 (stemed flower) from the kit edit/copy
Edit/paste as new layer into your image
Re-size 25%
Apply same drop shadow
Move to  right side of frame

14. Select element 2 (bag)  from the kit edit/copy
Edit/paste as new layer into your image
Re-size 10%
Image free rotate 15.00 right
Apply same drop shadow
Move to  right bottom side of image

15. Select element 13 (bow) from the kit edit/copy
Edit/paste as new layer into your image
Re-size 20%
Image free rotate 15.00 right
Apply same drop shadow
Move onto the bag

16. If any of your tube is showing below the flower
Take your eraser tool and erase it.

17. At this time add any text that you wish to

18. Re-size your image if you wish to all layers Smart Size.
I re-sized mine to 500 width height will adjust

19. Add a New Layer apply copyrights and watermark

20. Save your image in png format

Thanks for trying my tutorial I hope you enjoyed it.

I want to thank Marsha and Ruth for testing my tutorials

 If you use my tutorials for Stationary Stats
Please apply a credit in your footer
With a link back to where my tutorial is located.
Right click on mask to save it


©SassynSimple Tutorials

Monday, April 30, 2012

SPRING SONG

©SassynSimple Tutorials

Date Written: April 30, 2012

PROGRAMS YOU NEED
You are responsible for finding things you need to do this tutorial.
You will need a good working knowledge of the programs I use.
Paintshop or Corel Program 

ITEMS YOU NEED
 Thank all Of you whose items I used to make this tag.
I do appreciate the use of them.

TUBE: Of your Choice I used the artwork of Ismael Rac
You can purchase the tube HERE
KIT: Pokadot Scraps FTU Spring Song HERE
MASK: WeeScottsLass WSL Mask 289 HERE
FONT: Of your choice

READ BELOW BEFORE STARTING
Settings may differ slightly depending on program you use I use x2
Close original after you copy it unless I state otherwise.
RE-SIZE only one layer and sharpen once if needed
Left click and right click refers to mouse buttons.
Refer to my image for placement of items.

Now Lets Start

1.  Select your Tube minimize it for now

2. Open a new  700x600 transparent image (We will re-size later)
Selections/select all
Select Paper 9 from the kit edit/copy
Edit/paste into selection on you image
Selections/select none

3.  Layers/new mask layer/from Image
Select WSL Mask 289 in the window
(see other settings below)
Click Ok
Layers palette/right click mask/merge/merge group


4. Effect/3D/Drop Shadow
(see settings below)
Click OK


5.  Select Leaves 1 from the kit edit/copy
Edit/paste as new layer into your image
Re-size 70%
Apply drop shadow (settings below)
Move to  the right side of image


6.  Layers palette/right click leaves layer/duplicate 1 time
Image/mirror

7.  Select frame 4 from the kit edit/copy
Edit/paste as new layer into your image
Re-size 75%
Apply same drop shadow
Leave centered in image

8.  Image/free rotate 10.00 Left
Boxes not checked

9.  Using Magic Wand (settings below)
Click insde the frame window

Selections/modify Expand 12
Keep selected


10.  Layers palette/ right click on copy of leaves
Add a new raster layer
Select Paper 4 from th kit Edit/copy
Edit/paste into selction on your image
Selections/select none

11. Select ribbon 4 from the kit edit/copy
Edit/paste as new layer into your image  above frame
Re-size 60%
Apply same drop shadow
Move to  to right side of frame

12.  Select Your Tube  edit/copy
Edit/paste as new layer into your image
Re-size as needed I re-sized 75%
Apply same drop shadow
Center it in the frame
Use eraser tool and erase any parts hiding the frame

13. Select Leaves 3  from the kit edit/copy
Edit/paste as new layer into your image
Re-size 75%
Image/free rotate 80.00 right
Apply same drop shadow
Move to Bottom right side of the frame

14.  Select flower 3  from the kit edit/copy
Edit/paste as new layer into your image
Re-size 60%
Apply same drop shadow
Move to  Bottom of frame to the left of the edge of  frame

15. Select paperflower from the kit edit/copy
Edit/paste as new layer into your image
Re-size 30%
Apply same drop shadow
Center it in the first flower
Layers palette/right click/merge/merge down

16.  Layers palette/right click merged flowers/duplicate 1 time
Move it to the top left corner of frame

17. Select flower 4 from the kit Edit/copy
Edit/paste as new layer into your image
Re-size it 60%
Apply same drop shadow
Move to bottom of frame next to other flower

18.  Select string 2 from the kit Edit/copy
Edit/paste as new layer into your image
Re-size it 85%
Image/free rotate 10.00 left
Apply same drop shadow
Move it so that the left end side is inside the bead

19. At this time add any text that you wish to

20. Re-size your image if you wish to all layers Smart Size.
I re-sized mine 550 in width height will adjust.

21. Add a New Layer apply copyrights and watermark

22. Save your image in png format (do no use optimizer it will
Put a background into the image


Thanks for trying my tutorial I hope you enjoyed it.

I want to thank Marsha and Ruth for testing my tutorials

Please apply a credit in your footer
With a link back to where my tutorial is located.

I now put all my stationary tutorials in Incredimail letter form
you have to join my group
Our PSP Hideaway


©SassynSimple Tutorials

Wednesday, January 25, 2012

PUNKED

©SassynSimple Tutorials
PUNKED
Date Written: Jan 25, 2012


PROGRAMS YOU NEED
You are responsible for finding things you need to do this tutorial.
You will need a good working knowledge of the programs I use.
Paintshop or Corel Program


ITEMS YOU NEED
Thank all Of you whose items I used to make this tag.
I do appreciate the use of them.

TUBE: 3 Of your Choice I used Ismael Rac You
must buy this tube HERE
I have a license for this tube
KIT: A beautiful kit By Bella Scarta FTU Jar of Hearts HERE
MASK: Bitzy Beez Designz BBD_2012_SPMASK 1 or one of your choice
(you will find mind at the bottom of
the tutorial)
FONT: Of your choice

READ BELOW BEFORE STARTING
Settings may differ slightly depending on program you use I use x2
Close original after you copy it unless I state otherwise.
RE-SIZE only one layer and sharpen once if needed
Left click and right click refers to mou
se buttons.
Refer to my image for placement of items.

Now Lets Start

1. Select your Tubes and the mask, minimize them for now

2. Open a new 650x600 transpare
nt image
Layers Palette/right click/add a new raster Layer
Selections/select all

3. Select paper 8 from the kit Edit/copy
Edit/paste into selection on your i
mage
Selections/select none

4. Layers/new mask layer/from image
Select the mask in the window
(mask settings below)
Click OK
Layers palette/right click/merge/merge group
*** I re-sized my mask up 10
4%

5. Effects/3D/drop shadow
(Settings Below)
Click OK
6. Select Element 23 Cluster From the kit Edit/copy
Edit/paste as new layer into your image
Re-size it 85%
Apply same drop shadow
Move to top right side of image

7. Select Element 6 envelope cluster from the kit
Edit/copy
Edit/paste as new layer into your image
Re-size it 85%
Apply drop shadow move to left side of image

8. Select magic wand tool (settings below)
Click inside both windo
ws
Selections/modify/expand 5
Keep selected

9. Layers palette/right click raster 2 a new raster layer
using drop tool, Select a color from your image I used red
Flood fill the selections
Selections/select none

10. Select one of your close up tubes Edit/copy
Edit/paste as new layer into i
mage
Image/mirror (if needed)
Re-size as needed, I re-sized 85%
Image/free rotate/ 10.00 right (if needed)
Apply drop shadow
Move it into the top frame
the head should be above top of frame (see
image below)

11. Using lasso freehand tool

Make a selection around the top of tube
(see my image)
Make sure you do not go below envelope area
Edit/copy


12. Layers palette right click/frame cluster/add new raster layer
Edit/paste into selection/select none

13. Repeat step 10 to 12 for second close up
Placing tube in bottom frame window.
Note I did not rotate this tube

14. Select your full tube edit/copy
Edit/paste as new layer into your image
(should be top layer)
Re-size as needed, I re-sized mine 80%
Apply drop shadow
Move tube slightly to the right

15. Select Element 9 flower from the kit Edit/copy
Edit/paste as new layer into your image
Re-size it 50%
Apply same drop shadow
Move to right side just below gear

16. Select Element 19 gear cluster from the kit Edit/copy
Edit/paste as new layer into your image
Do not re-size
Apply same drop shadow
Move to bottom centered

17. Select Element 10 flower from the kit Edit/copy
Edit/paste as new layer into your image
Re-size it 50%
Apply same drop shadow
Move to right side just below other flower

18. Select Element 8 flower from the kit Edit/copy
Edit/paste as new layer into your image
Re-size it 40%
Apply same drop shadow
Move to bottom of image (see my image)

19. Select Element 12 butterfly from the kit Edit/copy
Edit/paste as new layer into your image
Re-size it 45%
Image/mirror
Apply same drop shadow
Move to top right side of image

20. Select Element 24 hearts from the kit Edit/copy
Edit/paste as new layer into your image
Re-size it 70%

Apply same drop shadow
Move to left side of image

21. Now apply any text you wish

22. Layers palette/click eye close mask layer
Right click any open layer/merge/merge visible
Re-size all layers 95%
Open back up mask layer

22. Re-size all layers to your desired tag size
I re-sized mine 450 in width height will adjust
Add a new layer and apply copyrights and watermark


23. Now save your image in png
You can merge visible if you wish but it will merge
Automatically when you save the image
BBD_2012_SP MASK 1
right click mask save image as
Thanks for trying my tutorial I hope you enjoyed it.

I want to thank Marsha and Ruth for testing my tutorials

If You use my tutorials in Stationary Please apply a credit in your footer
with a link back to where my tutorial is located.

I now put all my stationary tutorials in Incredimail letter form
you have to join my group to access them HERE
we also offer weekly challenges
Would you like to test for me?
apply HERE
(tester must read and do tutorials as written)


©SassynSimple Tutorials

Friday, January 6, 2012

MY DEAR


©SassynSimple Tutorials
My Dear
Written: Jan 6. 2012


PROGRAMS YOU WILL NEED
You are responsible for providing the items needed to do my tutorials.
You need a good working knowledge of the programs I use.
Paintshop or Corel Program

ITEMS YOU WILL NEED
Thanks to all Of you whose items I used to make this tutorial and tag.
I do appreciate the use of them.

TUBE: Of your Choice, I used the beautiful artwork of Ismael Rac ,
This is a PTU tube you can buy his artwork HERE
I have a bought it and have a license for it.
KIT: Laurie Made Me Scraps FTU Kit Moca Cream
MASK: of Your choice or Gems Mask 164 Here
FONT: Of your choice

THINGS YOU NEED TO KNOW AND DO
Settings may differ slightly depending on program you use I use x2
Close original after you copy it unless I state otherwise.
RE-SIZE only one layer and sharpen once if needed
Left click and right click refers to mouse buttons.
Refer to my image for placement of items.

Now Let's Get Started

1. Open your tube and Gems Mask 164 Minimize them for now.

2. Open a new transparent Image 700x600
Selections/select all
Select Paper 16 from the Kit edit/copy
Edit/paste into selection on your Image
Selections/Select none

3. Layers/New Mask Layer from Image
Select Gemsmask 164 in window
(settings below)
Click Ok
Layers palette/right click/merge/merge group
4. Layers palette right click mask layer duplicate 1 time
Layers palette/right click/merge merge down
I did not apply drop shadow but you can if want to

5. Select Element 40 frame from the kit Edit/copy
Edit/paste as new layer into your image
No re-size needed

6. Effects/3D/Drop Shadow
(settings below)
Click Ok


7. Using magic wand click inside the frame window
Selections/modify/expand 12
Layers palette/right click mask layer add a new raster layer
Keep selected

8. Select paper 3 from the kit Edit/copy
Edit/paste into selection on your image
Selections/select none

9. Select Element 16 leaves from the kit Edit/copy
Edit/paste as new layer into your image above frame
No re-size needed
Apply same drop shadow
Move to right side of frame top of it touching top of mask

10. Layers palette/right click/duplicate 1 time
Image/mirror
Move this over more to the left near the border of the mask

11. Select Element 22 flowers from the kit edit/copy
Edit/paste as new layer into your image
Re-size 80%
Apply same drop shadow
Place on top left side of frame

12. Select your tube Edit/copy
Edit/paste as new layer into your image
Re-size as needed, I re-sized 85%
Use eraser tool remove any part of the tube below the frame

13. Layers palette click on frame Layer
using selections tool
Draw out rectangle around bottom of frame that tube is hiding
(settings for selection tool below)
Edit/copy
keep selected

14. Layers palette right click tube layer/add new raster layer
Now edit/paste into selection
Selections select none
The bottom of your tube should not be showing now.

15. Select element 13 leaves from kit Edit/copy
Edit/paste as new layer into your image
No Re-size needed
Apply same drops shadow
Move to left side of frame

16. Select element 14 baby’s breath from kit Edit/copy
Edit/paste as new layer into your image
Re-size 75%
image/mirror
Apply same drops shadow
Move to right side of frame on top of leaves

17. Select element 48 flower from kit Edit/copy
Edit/paste as new layer into your image
Re-size 85%
Apply same drops shadow
Move to right side of frame on top of leaves

18. Select element 51 flower bud from kit Edit/copy
Edit/paste as new layer into your image
Re-size 85%
Apply same drops shadow
Move to right side of frame on top of flowers
Move down slightly under other flower

19. Select element 36 lamp from kit Edit/copy
Edit/paste as new layer into your image
Re-size 85%
Apply same drops shadow
Move to bottom right side of frame

20. Select element 19 leaves from kit Edit/copy
Edit/paste as new layer into your image
No Re-size
Image/free rotate 90.00 right boxes unchecked
Apply same drops shadow
Move to bottom frame moving to right till it touches lamp

21. Select element 28 flowers from kit Edit/copy
Edit/paste as new layer into your image
No Re-size
Image/free rotate 15.00 right boxes unchecked
Apply same drops shadow
Move to bottom of image slightly to the right

22. Select element 18 acorns from kit Edit/copy
Edit/paste as new layer into your image
Re-size 85%
Apply same drop shadow
Move to left side of frame centered

23. Select element 35 typewriter from kit Edit/copy
Edit/paste as new layer into your image
Re-size 85%
Image/free rotate 15.00 left boxes unchecked
Apply same drop shadow
Move to bottom left side of image

24. Select element 33 ribbon from kit Edit/copy
Edit/paste as new layer into your image
Re-size 75%
Image/flip
Apply same drop shadow
Move to bottom of image centered

25. Now adjust any elements if you need to
Apply your text

26. I cropped my image then
Re-sized it so that width was 550
Height will adjust

27. Add a new raster layer apply any copyrights or watermarks you need to

28. Layers palette/right click any layer/merge/merge visible
Now save your image png format.

Thanks for Trying my Tutorial I hope you Enjoyed it.

I want to thank Marsha and Ruth for testing my tutorials

If You use my tutorials in Stationary Please apply a credit in your footer
with a link back to where my tutorial is located.

I now put all my stationary tutorials in Incredimail letter form
you have to join my group to access them HERE
we also offer weekly challenges

Do
you like to test tutorials?
If so I am looking for testers to apply go HERE
My testers must read and do tutorials as written to help filter out mistakes.

©SassynSimple Tutorials

Thursday, December 1, 2011

MY ATTITUDE

©SassynSimple Tutorials
MY ATTITUDE
Date Written: Dec 1, 2011

PROGRAMS YOU NEED
You are responsible for finding things you need to do this tutorial.
You will need a good working knowledge of the programs I use.
Paintshop or Corel Program

ITEMS YOU NEED
Thank all Of you whose items I used to make this tag.
I do appreciate the use of them.

TUBE: Of your Choice I used the beautiful artwork of Ismael Rac
You must buy the tube HERE
I have a license for this tube
KIT: I used the awesome FTU Funky Punky by Lacarolita grab it HERE
MASK: Bitzy Beez Designz BBD 2011 Mask 96 HERE
FONT: Of your choice

READ BELOW BEFORE STARTING
Your Settings may differ slightly I use X2
Re-sizing will be different if you use another Kit
Close original after you copy it unless I state otherwise.
RE-SIZE only one layer and sharpen once if needed
Left click and right click refers to mouse buttons.
Refer to my image for placement of items.

Now Lets Start

1. Select and open your Tube and the mask minimize them for now

2. Open a new transparent image 700x700
we will re-size later
Selections/select all
Select paper 7 from the kit edit/copy
Edit/paste as into selection
Selections/select none

3. Layers/new mask layer/from image
Select the mask in the window
(settings below)
Click OK
Layer palette/right click/merge/merge group

4. Re-size the mask 105% smart size one layer

5. Effects/3D/Drop shadow
(settings below)

6. Select fence from the kit edit/copy
Edit/paste as new layer into your image
Re-size it 50%
Apply same drop shadow

7. Select LP1 from the kit edit/copy
Edit/paste as new layer into your image
Re-size it 55%
Apply same drop shadow

8. Select stars 3 from the kit edit/copy
Edit/paste as new layer into your image
Re-size it 50%
Apply same drop shadow

9. Select Chain 2 from the kit Edit/copy
Edit/paste as new layer into your image
Re-size it 60%
Apply same drop shadow
Move it up slightly

10. Select Ipod touch from the kit edit/copy
Edit/paste as new layer into your image
Re-size 40%
Image/free rotate 20.00 right
Apply same drop shadow
Move to right side of image

11. Select your tube edit/copy
Edit/paste as new layer into your image
Re-size as needed I re-sized 80%
Apply same drop shadow
Move tube to the left some

12. Select hat 2 from the kit edit/copy
Edit/paste as new layer into your image
Re-size 30%
Apply same drop shadow
Move to bottom right side of image

13. Select musical notes 3 from the kit edit/copy
Edit/paste as new layer into your image
Re-size it 80%
Apply same drop shadow move to the bottom of image

14. Select 1Guitar from the kit edit/copy
Edit/paste as new layer into your image
Re-size 40%
Apply same drop shadow
Move to left side of tube

15. Select Tie 2 from the kit edit/copy
Edit/paste as new layer into image
Re-size it 50%
Apply same drop shadow
Move to top right side of image

16. Apply your text at this time.

17. Re-size your image now all layers I re-sized to 500 width.
height will adjust
layers palette/right click/merge/merge visible
save your image in png format

Thanks for trying my tutorial and I hope you enjoyed it.

I want to thank Marsha and Ruth for testing my tutorials

If You use my tutorials in Stationary Please apply a credit in your footer
with a link back to where my tutorial is located.

I now put all my stationary tutorials in Incredimail letter form
you have to join my group to access them in our Public Group HERE
we also offer weekly challenges

If you would like to test my tutorials you are welcome to join my Tester Group HERE
©SassynSimple Tutorials
Sunday, October 31, 2010

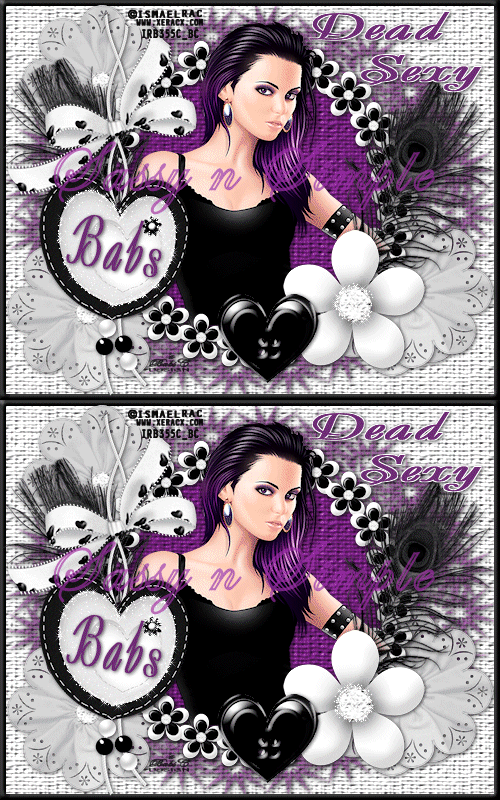
DEAD SEXY

©Sassy n Simple
DEAD SEXY
Date Written: Oct 30, 2
010

Programs needed
Paintshop or Corel Program
ANIMATION SHOP
You will need a good working knowledge of the program.
PLUGINS: Xenoflex 2 constellation Demo

Other Items needed
TUBE: Of your Choice I used Ismael Rac you will find the tube HERE
KIT: Lacrolta’s Black n White FTU HERE
FONT: of your choice
MASK: Essex Girl Framed in stars HERE but include in my supplies
MY SUPPLIES: HERE

READ BELOW BEFORE STARTING
Settings may differ slightly depending on your version.
Close original after you copy it unless I state otherwise.
Sharpen all re-sized items 1 time.
RE-SIZE only one layer unless other wise stated.
Refer to my image for placement of items.
Left click and right click refers to mouse buttons.

Now Lets Start

1. First Put the texture I included in my supplies in your PSP
Texture file. You should find that in your documents in the PSP folder
Older version may have to place in the Programs files in the version you are running folder

2. Select your tube and the mask in my supplies minimize them for now.

3. Open a new transparent Image 500x400
Flood fill with white
Effects/texture/Textures
Select the Texture I supplied in the supplies
Settings below

4. Layers palette/right click add new raster layer
Using drop tool left click foreground color
pull up your tube Select a color from your tube I used Purple
Flood fill the layer
Effects/Textures/same texture same setting

5. Layers New mask Layer/from image settings below
Select sg_framed in stars mask


6. Layers palette/right click black/white mask
Delete
Would you like this mask merged into layer below YES
Layers palette/right click top mask/ merge/merge group

7. Effects/3D/drop shadow settings below


8. Layers palette/right click add a new raster layer
Flood fill with black
Selections/select all
Selections/modify contract 6
Hit your delete button or Edit/clear
Selections/select none

9. Effects/3D/inner bevel setting below

10. Layers palette right click merge/merge visible

11. Select frame 2 from the Kit Edit/copy
Edit/paste as new layer into your image
Re-size it 3%%
Apply same drop shadow

12. Select magic wand settings below click inside the frame
Selections/select all
Selections/modify expand 8
Flood fill with same color you used for mask
Apply the texture to it
Selections/select none

13. Select your Tube Edit/copy
Edit/paste as new layer into your image
Re-size as needed I re-sized 50%
Place it so the head is above the frame
Apply same drop shadow

14. Make your frame layer active
Using selection tool rectangle settings below
select the bottom part of your frame
Edit/copy
Layers palette/right click add new raster layer above your tube
Edit/paste into selection
Selections select none

15. Layers palette close of raster 1 layer
Merge/merge visible
Click eye and close merged frame and tube layer for now

16. Select flower 4 from the Kit Edit/copy
Edit/paste as new layer into image above raster 1
Re-size it 20%
Apply same drop shadow
Move it to the right bottom corner

17. Still on flower layer
Layers palette/right click/duplicate it 2 times
Place one in bottom left corner
Place one in top left corner
Open back up tube layer make it active
Adjust the flowers if you need to

18. Select feather 1 from kit Edit/copy
Edit/paste as new raster layer into your image
Re-size it 30%
Apply same drop shadow
Move to right side of frame
Layers palette/right click/duplicate 1 time
Image/mirror duplicate

19. Select flower 5 from Kit Edit/copy
Edit/paste as new layer into image
Re-size it 20%
Apply same drop shadow
Move over to right bottom side of frame

20. Select heart button 3 from the kit Edit/copy
Edit/paste as new layer into image
Re-size it 20%
Apply same drop shadow move over beside flower

21. Select the embellishment heart from kit
Edit/copy, Edit/paste as new layer into image
Re-size 40%
Apply same drop shadow move to left side of frame

22. Select bow 4 from the kit Edit/copy
Edit/paste as new layer into image
Re-size it 20%
Apply same drop shadow
Move to top left side of frame

23. Apply your text at this time

24. Add a new raster layer.
Apply your copyrights and watermarks

25. Layer palette/right click/merge/merge visible

You can save your image as jpeg now or continue to animation

ANIMATION

1. Using magic wand same settings
Click on the white part of the heart and the center of the flower
You may have to click twice to get it to expand around the diamond
Edit/copy
Keep selected

2. Layers palette right click add a new raster layer
Edit/paste into selection
Selections/select none
Layer palette/right click duplicate 1 time

3. Effects/plugins Xenoflex 2 constellations settings below
Layers palette close of copy of raster 2.
4. Select raster 2 Apply the xenoflex constellations again
But hit the random seed button one time

5. Edit/copy/copy merged
Take it to animation shop right click paste as new animation

6. Back in PsP close off Raster 2, Open copy of raster 2
Edit/copy
Take it to animation shop right click first frame
Paste/paste after current frame

7. Save your animation

Thanks for trying my tutorial I hope you enjoyed it.
Please if you use it to make a stat apply below credit in your footer

Tutorial by: ©Sassy n Simple
HERE or HERE
You can copy and paste the above but if does not work links below
http://www.sassynsimple.com/
And to here http://groups.yahoo.com/group/sassynsimple/

©Sassy n Simple

Wednesday, September 29, 2010

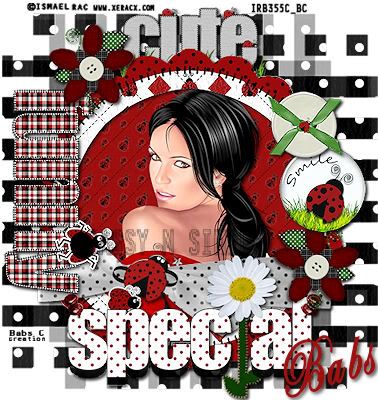
CUTE SPECIAL

©Sassy n Simple

CUTE N SPECIAL

Date Written: Aug 23, 2010


THINGS YOU NEED
Paintshop or Corel Program
You will need a good working knowledge of the program.

TUBE: Ismael Rac PTU you must purchase it you will find him HERE
KIT: Fania ladybug-mariquita FTU HERE
FONT: Of Your Choice
MASK: Essex Girl sg_checkered.pspmask HERE

READ BELOW BEFORE STARTING
Settings may differ slightly depending on your version.
Close original after you copy it unless I state otherwise.
Sharpen all re-sized items 1 time.
RE-SIZE only one layer unless other wise stated.
Refer to my image for placement of items.
Left click and right click refers to mouse buttons.

Now Lets Start

1. Open a new transparent Image 500x500
This is your working Image
I will use the initial (WI) for working Image
Select white in your foreground color an
d flood fill image

2. Layers palette/right click/add new raster Layer
Selections/select all
Select paper 3 from kit Edit/copy
Edit/paste into selection
Selections/select none

3. Layers/new mask Layer/from image (settings below)
Make sure to select sg_checkered.psp_mask in the window
Click Ok


4. Layers palette/right click black/white mask
Delete
Would you like this mask merged into layer below YES
Layers palette/right click top mask/ merge/merge group

5. Select FAS Element 12 From the kit Edit/copy
Edit/paste as new Layer in WI
Re-size it 35% Adjust/sharpen

6. Effects/3D/drop shadow (settings Below)


7. Select Magic Wand Click inside frame window
Selections/modify/expand 12
Keep Selected

8. Layers palette/ right click raster 1/add new raster Layer
Select Paper FAS paper 5 from kit edit/copy
Edit/paste into selection on new layer in WI
Selections/select none

9. Select your Tube Edit/copy
Edit/paste as new layer above raster 3 (below frame) in WI
Re-size as needed I re-sized 55% adjust/sharpen
Apply Same drops shadow

10. Layers palette/click eye on raster 1 closing it
Right click on any layer merge/merge visible
Move the merged image down some

11. Select FAS element 33 from the kit Edit/copy
Edit/paste as new layer in WI above raster 1
Re-size it 15% adjust/sharpen
Apply same drop shadow
Move to the top of frame so that grass is not showing

12. Select FAS element 31 from kit edit/copy
Edit/paste as new layer in WI
Re-size it 25% adjust/sharpen
Apply same drop shadow

13. Image/free rotate 90 Right
All boxes unchecked
Move it to the left side of frame

14. Select FAS Element 17 from kit Edit/copy
Edit/paste as new layer above merged layer in WI
Re-size it 25% adjust/sharpen
Place towards bottom of frame
Apply same drop shadow

15. Select FAS element 4 from kit Edit/copy
Edit/paste as new layer in WI
Re-size it 15% adjust/sharpen
Apply same drop shadow
Move it to the right side near the ribbon

16. Layers palette/right click element 4/duplicate 1 time
Image/mirror
Move it between cute and funny on left side of frame

17. Select element 32 from kit Edit/copy
Edit/paste as new layer above flower (top layer)
Re-size it 30% adjust/sharpen
Apply same drop shadow
Move it to the bottom of frame

18. Select FAS element 10 from kit edit/copy
Edit/paste as new layer in WI
Re-size it 20% adjust/sharpen
Move above flower

19. Select FAS element 3 edit/copy
Edit/paste as new layer in WI
Re-size 25% adjust/sharpen
Apply same drop shadow
Move above smile button

20. Layers Palette/right click/merge/merge visible

21. Use your crop tool to crop in close around the mask

22. Add a new layer apply watermark and copyrights

23. Add text if you want to.. Then save in jpg form


Thanks for trying my tutorial I hope you enjoyed it.

I want to thank my testers at SassynSimple Group for testing this tutorial.
They help to make my tutorials better.

©Sassy n Simple


Wednesday, February 17, 2010

TAKE IT OFF


DATE WRITTEN: Feb 17, 2010
To do this Tutorial you need a Paintshop or a Corel program and Animation Shop. You must have a good working knowledge of the programs. Depending on your program settings may vary slightly.

TUBE: Ismael Rac I got it at AMI you must purchase it HERE NOW

KIT: Linda’s Dream Designs Passion Abloom PTU tagger puchase it at TKO
MASK: Zuzzanna Zuz_Mask_56 HERE
FONT: Of Your choice you will need 2

Read the following they will not repeated
Always Close original image after you copy unless stated otherwise.
Always sharpen re-sized items one time.
Right click, Left click refers to mouse buttons.
Drop shadow settings will always stay set

1. Open your Tube and the Zuz_Mask 56 mask, minimize for now.

2. Open a new transparent image 700x750 flood fill with white

3. Layers palette/right click/add new raster Layer
Selections/select all
Select Paper 2 from kit. Edit copy
Edit/paste into selection
Selections/select none

4. Layers New Mask Layer/from Image
Select Zuz_Mask_56 in the window.
source luminance/checked
Invert mask data/checked click ok.

5. Layers palette/Right click black/white mask
Delete/click yes.
next pop up window comes up select Yes
Right click mask layer Merge/merge group.
Right click/merge/merge down

6. Select Frame 1 from the kit, Edit/copy
Edit/paste as new layer into your working image
Re-size 85%
Image/free rotate left 15.00
uncheck boxes below
all layers
rotate single layer around canvas center


7. Still on frame Effects/3D/Drop Shadow (settings Below)
Vertical and horizontal 2
Opacity 70
Blur 5.00
color black
Shadow on new layer not checked

8. With magic wand (settings below) click inside your frame window
Selections/modify/expand 12
Keep selected
9. Add a new raster layer under your frame
Select Paper 6 from the kit Edit/copy
Edit paste into selection
Selections/Select none

10. Select your Tube Edit/copy
Edit/paste as new layer into your working image below frame
Re-size if needed I re-sized 50%
Apply same drop shadow
Image/free rotate 15.00 left
Center in frame

11. Select Flower 5 from the kit, Edit copy
Edit/paste as new layer into your working image above frame
Re-size 50%
Apply same drop shadow
Place on right bottom corner of frame
Layers palette/right click/duplicate 1 time
Move duplicate to left top corner of frame

12. Select button 1 from kit, Edit/copy
Edit/paste as new layer into your working image below your bottom flower layer
Re-size 30%
Apply same drop shadow
Move just above the top of the bottom flower (see my image)
Layers palette/right click/duplicate 1 time
Move this to the left side of bottom flower (see my image)

13. Apply copyrights and watermark

14. Layers palette/right click any layer/merge/merge visible

15. Re-size your image 450 in width height will adjust

16. Use dropper tool select a color that will stand out

17. Select your text tool (settings below) select a medium to fat print style font Type out TAKE IT OFF
Use node to size it place at top.
Layers palette/right click/convert to raster layer
Apply same drop shadow.

18. Still using text tool select a different font type out SPRING IS HERE
Size with nodes so it fits under your frame
Use rotation bar to rotate it.
Apply same drop shadow
Layers palette/right click/convert to raster layer

20. If you want to add your name repeat step 18.

21. Close of the text Layer TAKE IT OFF by clicking the eye on the layer in layers palette

22. Edit/copy/copy merged


ANIMATION:
Open animation shop

1. Right click anywhere in work space paste as new animation

2. Now right click the frame duplicate selected.. Do this until you have a total of 5 frames. If you get to many frames delete the frames you do not need..

3. Click first frame Edit/select all move this animation over so that it does not take up entire window but leave it large enough that you can view the first frame entirely..

4. Back in PSP close off all layers open the Text Layer TAKE IT OFF
Edit/copy

5. Back in Animation shop right click in your open workspace/paste as new animation

6. On the tool bar Effect/Image Effects (see images below) for settings
Click OK. You should have 5 frames

7. Click on the first frame Edit/select all

8. Make sure you have this tool selected (see image below) click on the first frame of the Text hold mouse down drag it into your first Animation placing it at the top where it should go do not release your mouse button until you have it where you want it.. Top/Centered

9. Should you not be happy with placement go to edit click undo drag click back on the animation where you got the text from and to that again. Now you can drag it again and place it better.

10. On your image Go to Edit/select none. Now right click first frame/frame properties change display time to 40 all frames should be 10

11. Save your animation

I hope you enjoy doing my Basic Steps

I want to thank the testers of Babs SassynSimple TagsnTuts for helping to make them mistake free.

Thursday, November 5, 2009

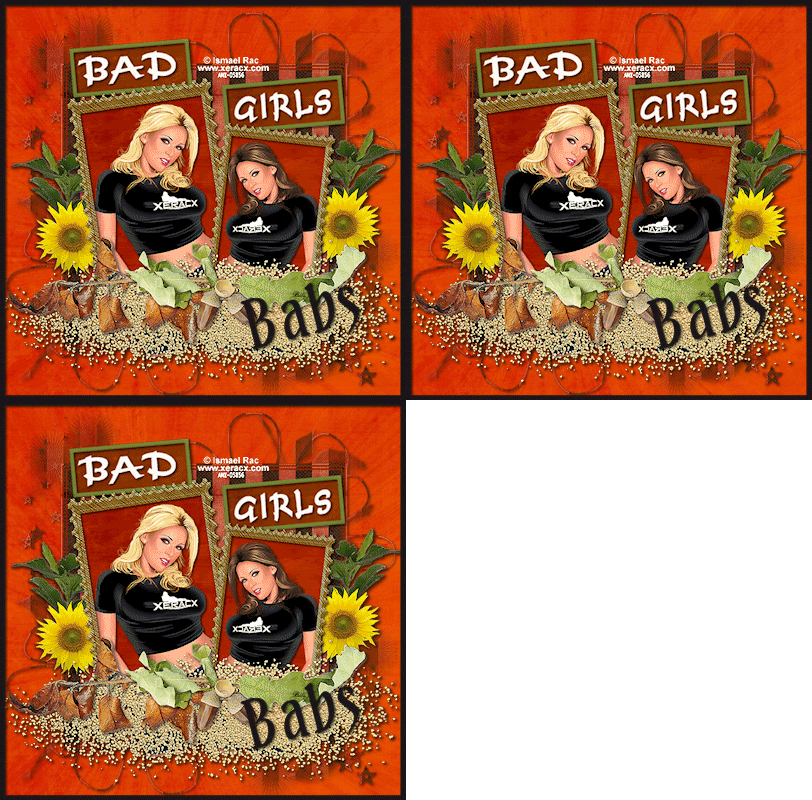
BAD GIRLS

©Sassy n Simple
BAD GIRLS

DATE WRITTEN: Nov 5, 2009

THINGS NEEDED
Jasc Paintshop Pro or Corel Paint Program
PLUGINS: VM Natural Lightsplash.
You must have a good working knowledge of the programs I use.

ITEMS NEEDED
TUBE: Ismael Rac I purchased at AMI but he has is own store now HERE
KIT: Diva Designz PTU Tagger Fall Wishes purchase HERE or HERE
MASK: zuzzanna_mask 34 HERE included in my supplies
FONT: Of your choice

MY SUPPLIES: HERE


READ BELOW BEFORE STARTING
Settings may differ slightly depending on your version.
Close original after you copy it unless I state otherwise.
Sharpen all re-sized items 1 time.
RE-SIZE only one layer unless other wise stated.
Refer to my image for placement of items.
Left click and right click refers to mouse buttons.


Let's Begin
Open your tubes (2) and the mask minimize for now.

1. Open a new image 700x700 Selections/select all.
Select paper 2 from the kit, edit/copy
Edit/paste into selection.
Selections/select none

2. Select paper 8 from the kit. Edit/copy,
Edit/paste as new layer into your image.

3. Layers New Mask Layer/from Image
Select the zuzzanna_mask34
in the window
source luminance/checked Invert mask data/checked
Click ok


4. Layers palette/Right click mask layer Merge/merge group

5. Select Frame 2 from the Kit Edit/copy
Edit/paste as new layer into your image
Re-size it 75%
Effects/3D/drop shadow
Vertical and horizontal 2
Opacity 70
Blur 5.00
color black
Shadow on new layer not checked


6. Still on Frame Layer Select your magic wand
(settings below) click inside both frame windows
Selections/modify/ expand 8
Keep Selected


7. Right Click on the mask layer Add a new raster layer.
Select Paper 2 from the Kit Edit copy,
Edit/paste into selection.
Selections/select none

8. Select your Tubes Edit/copy,
Edit/paste as new layer into your image Each Tube.
Take one Tube Image/free rotate/Left 10.00 (see other settings below).
Now Take the other Tube image Image/free rotate/ right 5.00
apply your drop shadow to both tubes.
Center them in the frame window.
Uncheck the following boxes
Rotate all layers
Rotate single layer around canvas

9. Now Close off your background and mask layer
right click any open layer and merge/merge visible.


10. Select Flower element 4 from the kit, Edit/copy,
Edit/paste as new layer into your image. Under your frame layer
Re-size it 25%.
Move it to the right side of your frame leaving some of it behind the frame.
Duplicate it 1 time. Image/mirror your duplicate.
Make sure some of it is slightly behind your frame.

11. Open the Tag template in my supplies.
Select the Tag Back Layer in your layers palette, Edit/copy,
Edit/paste as new layer into your image.
Select your magic wand and click on the Tag Back
select Paper 3 from the kit edit/copy
Edit/paste into selection.
Selections/select none.
Duplicate it 1 time.
Move one to the right side one to the left side. (do not rotate yet).

12. Back to my template select the frame layer in your layers palette. Edit/copy,
Edit/paste as new layer into your image.
Click on it with your magic wand.
Use your dropper tool select a color from your image left click/foreground color.
Then flood fill the selection. Selections/select none. Duplicate it 1 time

13. Now Position the frames over each of your tag backs.
In your layers palette,
Drag the frame Down so that it is above the matching back.
Once you do that Right Click on the frame in layers palette and merge down.

14. Back in the Tag Template select the BAD Layer Edit/copy,
Edit/paste as new layer into your image over the right Tag/merged layer.
Apply your drop shadow.
In your layers Palette Right Click the Bad Layer merge/merge down.
Now Repeat this for the word Girls.
In your layers palette Drag your tags Below your merged Frame Layer.

15. On The Bad Layer Image/free rotate 5.00 to the right.
Free rotate the Girl Tag Layer only change it to Left this time

16. Now close off your background layer
right click any layer in the layers palette merge/merge visible.
Apply your drop shadow.

17. Select dropper tool to select a color from your image
left click/foreground color,
right click/background layer
select the Text tool (settings below)
Select a font of your choice.
Type our your name.
Use your nodes to size your text. Rotate it to the Right.
layers palette/right click convert to raster layer.
Apply your drop shadow.


18. Using your crop tool Crop your image close in but do not cut off any of the mask.

19. Select your rectangle tool
see settings below.
Set your foreground color to black
close off your Background color.
Start at top Left Corner ending in the right bottom corner
draw out your rectangle
Object/align/center in canvas then
Right click on the layer in your layers palette convert to raster layer
apply your same drop shadow.


20. Add your watermark and copyrights.
Re-size image all layers/smart size.
So that width is 400 height will adjust21 Close Background Layer right click in layers palette merge Visible.
Should only have two layers now..

22. Duplicate your back ground layer 2 times.


21 Layers palette/click eye to close Background Layer
right click any layer merge/ merge Visible.
You should only have two layers now..


22. Duplicate your back ground layer 3 times.


ANIMATION Open your Animation shop I will refer to it as AS

1. In On your bottom background layer Effects/VM Natural Lightsplash
Apply settings below.
Leave this layer open


2. On the middle background Layer Effects/VM Natural Lightsplash Apply settings below.
Close off this layer


3. On the top background Layer Effects/VM Natural Lightsplash
Apply settings below.
Close off this Layer


4. Only your merged layer and bottom background layer should be open Edit/copy merged

5. Go to AS and right click anywhere in the workspace paste as new animation.

6. Back In PsP close off the bottom Background Layer.
Open the middle background layer Edit/copy merged
Back in AS right click the first frame paste/paste after current frame.

7. Back in PsP close off the middle back layer.
Open the Top back ground Layer. Edit/copy merged.
In AS right click paste/after current Frame.


I hope you enjoyed this tutorial.

Using my Tutorials to make your Stationary?
Please place a credit like below in your footer

Tutorial by Babs C
HERE or HERE
Link back to the links below please
http://sassynsimpletagtuts.blogspot.com/
http://groups.yahoo.com/group/sassynsimple/

I want to thank all the testers for testing my tutorials
I appreciate their help so much.

©Sassy n Simple