Showing posts with label PATRITOTIC. Show all posts

Sunday, May 1, 2011

USA MADE


©SassynSimple Tutorials
Date Written: April, 23, 2011

PROGRAMS YOU NEED
You are responsible for finding things need to do this tutorial.
You will need a good working knowledge of the programs I use.
Paintshop or Corel Program

ITEMS YOU NEED
TUBE: Of your Choice I used Pinuptoons I have a license you can get it at CDO
KIT: Jenny’s Designs FTU American Girls HERE
MASK: Vix mask151 HERE
FONT: Of your choice

READ BELOW BEFORE STARTING
Settings may differ slightly depending on Program and Kit used
Close original after you copy it unless I state otherwise.
RE-SIZE only one layer and sharpen once if needed
Left click and right click refers to mouse buttons.
Refer to my image for placement of items.

Now Lets Start

1. Select your Tube and open it and the Vix mask151 minimize them for now

2. Open a new transparent image 600x600
Selections/select all
Select paper 4 from the kit
re-size this paper all layers 20%
Edit/copy, edit/past into selection on your image
Keep selected

3. Layers palette/right click raster 1/add a new raster layer
Select paper 1 From the kit Edit/copy
Edit/paste into selection
Selections/contract 12
Hit delete on your keyboard
Selections/select none

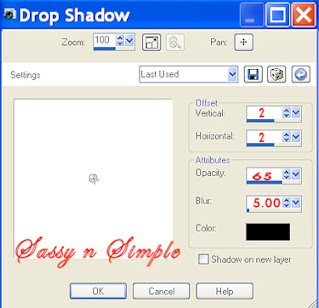
4. Effects/3D Effects/drop shadow
(Settings below)
5. Layers palette/right click/raster 1/ add a new raster layer
Selections/select all
Select paper 3 from the kit Edit/copy
Edit/paste into selection on your image
Selections/select none

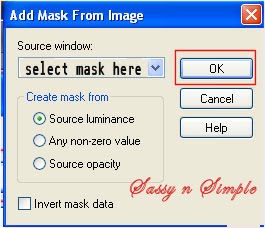
6. Layers/New Mask/from Image
Select Vix mask151 in the window
Settings below
Click ok
7. Layers palette/right click black/white mask
Merge/merge group
Apply drop shadow

8. Select Stars 1 from the kit Edit/copy
Edit/paste as new layer into image
Re-size 85%
Apply same drop shadow
Move to top right corner

9. Layers palette/right click stars/duplicate 1 time
Image/Mirror
Image/flip

10. Select film frame from the Kit edit/copy
Edit/paste as new layer into image
No re-size needed
Apply same drop shadow

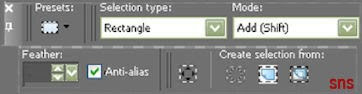
11. Select magic wand
(settings below)
Click inside both frame windows
Selections/modify/expand 10
Keep selected

12. Layers palette/right click copy of raster 3/Add a new raster layer
Select paper 2 from the kit Edit/copy
Edit/paste into selection on new raster layer
Selections/select none

13. Select your Tube edit/copy
Edit/paste as new layer into your image
Re-size as needed I re-sized 85%
Apply same drop shadow
Move it so that it looks like it is coming out of bottom frame

14. Using selection tool Select the head part of tube
(settings for selection tool below)
Edit/copy
Edit/paste it below your frame layer
Re-size it to fit in the frame window if needed
Place in top left frame window
Layers palette change blend to luminance
15. Layers palette/right click duplicate tube head 1 time Image/mirror place in bottom right frame window 16. Select stars 3 from the kit Edit/copy Edit/paste as new layer into image above raster 4 frame layer Re-size 30% Apply same drop shadow Move to bottom right corner 17. Layers palette/right click stars/duplicate 1 time Image/mirror Move this up to top left side of frame 18. Apply your text now 19, Re-size all layers 500x500 20. Add a new raster layer apply copyrights and watermarks 21. Save your image in jpeg form

Thanks for trying my tutorial I hope you enjoyed it.

If You use my tutorials in Stationary Please apply Credit

I really want to thank my Sassy n Simple Group Testers for helping test
This and make it mistake free. They do a wonderful job testing my tutorials.
Marsha
Melody
Linda
Ruth

I now put my Stationary tutorials in Incredimail Letter Form
These can only be accessed by joining My group below
Our PSP Hideaways
Public group hosting weekly challenges

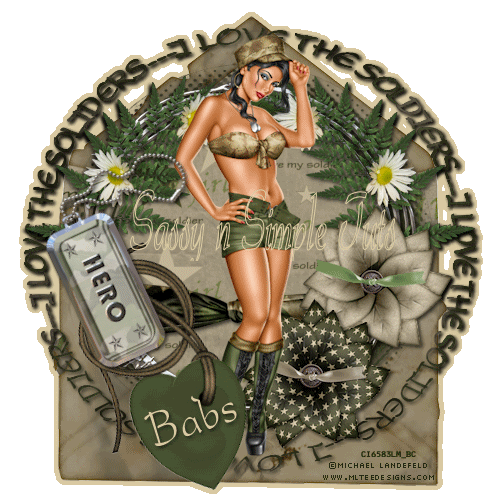

Sunday, March 13, 2011

I LOVE MY SOLDIER


I LOVE MY SOLDIER
©SassynSimple Tutorials
Date Written: Nov, 25, 2010

THINGS YOU NEED
PROGRAMS NEEDED
Paintshop Pro or Corel Program
ANIMATION SHOP
Settings may vary depending On your programs version

ITEMS YOU NEED
TUBE: Of your choice I used Michael Landefel PTU I bought it at CILM
I have a license for this tube
KIT: Sky Scraps FTU Tagger Camo HERE
FONT: Of Your Choice
MASK: My sns_mask03_ILTS HERE


READ BELOW BEFORE STARTING
Settings may differ slightly depending on your version.
Close original after you copy it unless I state otherwise.
Sharpen all re-sized items 1 time.
RE-SIZE only one layer unless other wise stated.
Refer to my image for placement of items.
Left click and right click refers to mouse buttons.

Now Lets Start

1. Open a new transparent Image 500x500
Do not fill

2. 7. Select envelope 1 from the Kit Edit/copy
Edit/paste as new layer into your image
Re-size 80%

3. Effects/3D/ drop shadow settings below


4. Layers Palette/right click raster 2 add a new raster Layer
Selections/Select all
Select Paper 3 from the Kit Edit/copy
Edit/paste into selection
Selections/select none

5. Layers/Add New Mask Layer/from Image settings below
select sns_mask03_ILTS In the window
4. Layers Palette/right click raster 2 add a new raster Layer
Selections/Select all
Select Paper 3 from the Kit Edit/copy
Edit/paste into selection
Selections/select none

5. Layers/Add New Mask Layer/from Image settings below
select sns_mask03_ILTS In the window
6. Layers palette/right click black/white mask
Delete
Would you like this mask merged into layer below YES
Layers palette/right click top mask/ merge/merge group

7. Layers palette/right click mask duplicate 1 time
Right click duplicate layer/merge/merge down
Apply same drop shadow

8. Select frame 1 from the Kit Edit/copy
Edit/paste as new layer into your image
Re-size it 65%
Apply same drop shadow
Move it slightly to the right

9. Select magic wand settings below
Click inside the frame window
Selections/modify/expand 11
Keep selected


10. Layers palette right click mask layer (Group raster)
add a new raster layer
Select paper 15 from the kit Edit/copy
Edit/paste into selection on your image
Selections/select none

11. Select Feulliage 4 from the kit Edit/copy
Edit/paste as new layer above your frame
Re-size it 45%
Apply same drop shadow
Move to top right side of frame

12. Still on Feulliage/layers palette right click/duplicate 1 time
Image/mirror

13. Select knotted ribbon 2 from the Kit Edit/copy
Edit/paste as new layer into your image
Re-size it 50%
Apply same drop shadow
Move it down on frame till the sides are even with the frame sides

14. Select Flower 3 from Kit Edit/copy
Edit/paste as new layer into your image
Re-size it 45%
Apply same drop shadow
Move to right side centered

15. Select Flower 2 from Kit Edit/copy
Edit/paste as new layer into your image
Re-size it 45%
Move it below the other flower

16. Select your tube Edit/copy
Edit/paste as new layer into your image
Re-size as needed I re-sized 85%
Apply same drop shadow
Center in frame

17. Select Heart pendant 2 from the Kit Edit/copy
Edit/paste as new layer into your image
Re-size it 60%
Apply same drop shadow

18. Still on heart pendant
Image/free rotate 15.00 left
Boxes unchecked
Move to left side of your frame heart tie on ribbon

19. Select TagHero from the kit Edit/copy
Edit/paste as new layer into your image
Re-size it 50%
Apply same drop shadow
Place on left side of the frame

20. Still on Tag
Image/free rotate 25.00 left

21. Close off your raster 1 background layer
Layers palette/right click any open layer
Merge/merge visible
Open background layer back up

22. Under your selections tab do the below
A. select all
B. select float
C. Select defloat.
D modify expand 4
Keep Selected

23. Use dropper tool left click select light color from image
Now flood fill the selection on raster 1 background layer
Selections/select none

24. Layers palette right click/merge/merge visible

25. Add Your name now.
Make sure to keep it on the image

26. Apply watermarks and copy right
make sure to keep them on the image

25. Save your image in png form
Or take it to animation shop and save as gift.
I prefer saving mine using animation shop


Thanks for trying my tutorial I hope you enjoyed it.


If You use my tutorials in Stationary Please apply Credit Below

Tutorial by Babs C
HERE

You can copy and paste the above if that does not work use Links below
http://groups.yahoo.com/group/sassynsimple/

I want to thank the Members of SassynSimple Group for testing my Tutorials
I appreciate them helping to make the tutorials mistake free.


Friday, May 28, 2010

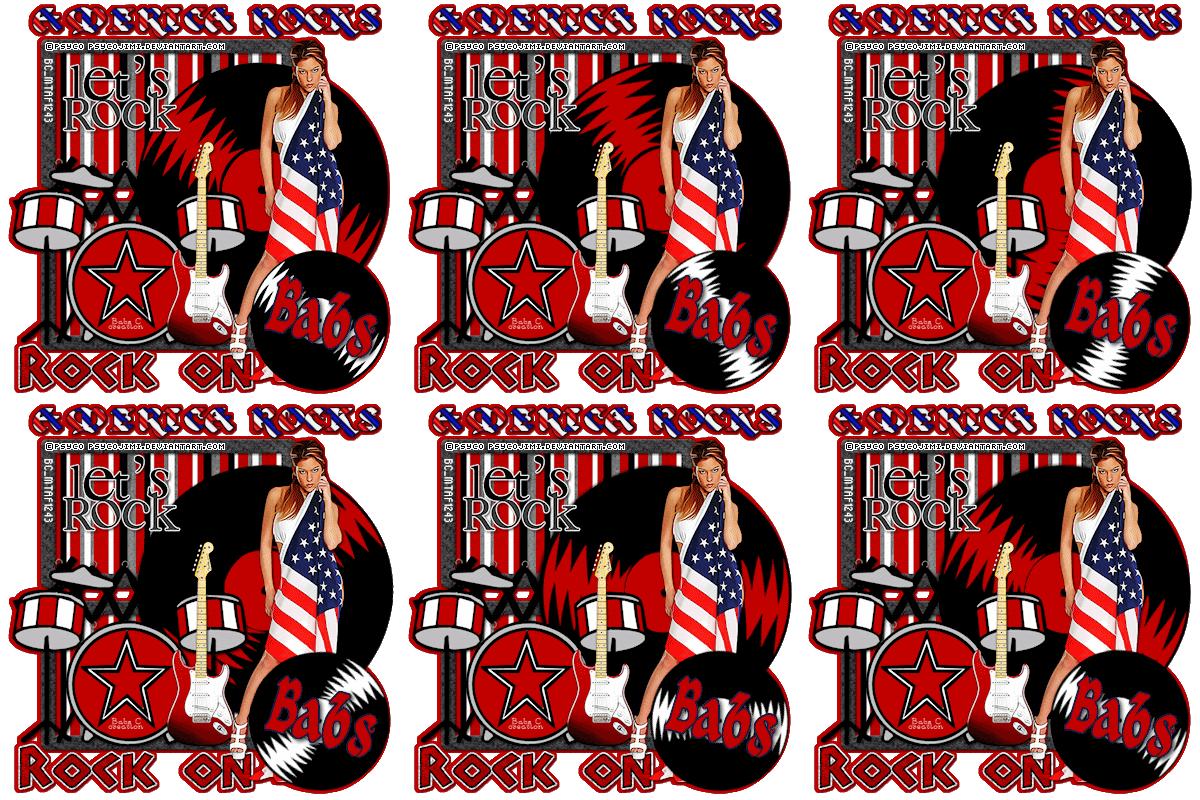
AMERICA ROCKS

©SassynSimple Tutorials


AMERICA ROCKS


DATE WRITTEN: May , 2010
 
THINGS NEEDED
PAINT SHOP OR COREL PROGRAM
JASC ANIMATION SHOP

CREDITS
TUBES: Psyco Jimi Happy 4th and strat guitar tubes they are FTU but you need a License from Mistaken Art.
I have a license MtAF1243

KIT: Bel Vidotti FTU tagger Kit Rock'n'Roll
FONT: fFTU from DaFont Kingthings Xander

READ BELOW BEFORE STARTING THEY WILL NOT BE REPEATED
Settings may differ slightly depending on your version.
Close original image after you copy unless I state other wise.
Sharpen all re-sized items 1 time
RE-SIZE only one layer unless other wise stated.
Refer to my image for placement of items.
Left click and right click refers to mouse buttons.

Now you can jump right on in..

1. Open Tubes, minimize for now.

2. Open a new transparent image 700x700 (working image)
Fill with background color if you wish to.
However I will have a steps later to create a no background tag.


3. Select frame element rocke 52 from Kit, Edit/copy
Edit/paste as new layer into working image
No re-size
Move frame to the left but not to close to edge

4. Still on frame Effects/3D/drop shadow (settings below)


5. Select magic wand (settings below)
Click inside both frame windows
Selections/modify/expand 12
Keep selected

6. Layers palette/right click raster 1/add new raster layer
Select paper 05 from kit. Edit/copy
Edit/paste into selection
Selections/select none

7. Layers palette click eye close raster 1 (bottom layer)
Right click any open layer/merge/merge visible

8. Select record element rocke 61 from kit, edit/copy
Edit/paste as new layer into working image above merged frame
No re-size
Apply same drop shadow
Move to the right some again not to close to edge
Layers palette/right click rename record 1

9. Select drums element rocke 59 from kit, edit/copy
Edit/paste as new layer into working image

10. Select word art rocke 04 from kit, edit/copy
Edit/paste as new layer into working image
Re-size 80%
Apply same drop shadow
Move to top left corner inside frame area

11. Select word art rocke 08 from kit, edit/copy
Edit/paste as new layer into working image
No re-size
Apply same drop shadow
Move to bottom left corner below frame area

12. Select Psyco Jimi’s strat guitar image, Edit/copy
Edit/paste as new layer into working image
Re-size 60%
Apply same drop shadow
Place on right side of drums

13. Select Psyco Jimi’s happy 4th image, Edit/copy
Edit/paste as new layer into working image
Re-size 60%
Apply same drop shadow
Place on right side of drums

14. Select a color you want to use for text I used a gradient
Angle 45 and repeats of 20

15. Select text tool (settings below step) font of your choice I used FTU Kingthings Xander
Type out AMERICA ROCKS
Use nodes to size it to fit at top or image
Layers palette/right click text/convert to raster layer

16. Optional you can put an out line around text by doing following
under selections tab do all of the following..
A. select all,
B. select float.
C. Select defloat.
D modify expand 2
Keep selected.

Layers palette/add new raster layer below text layer
Flood fill selection with solid color I used dark blue
Selections/select none

17. If you want to add your name repeat steps 15 and 16.

18. Layers palette click eye close record 1 layer, merged frame layer and raster one layer if you opened it back up

19. Add your copyrights and water marks at this time.

20. Layers palette/right click any open layer/merge/merge visible
You should have 4 layers now

21. Select record element 60 from kit. Edit/copy
Edit/paste as new layer into working image as top layer
Re-size 55%
Apply same drop shadow
Move to bottom right side of image
Layers palette/right click rename record 2

22. Now re-size all layers/smart size to 400x400

23. Optional.. If you wish a clear background Go to Edit/copy/ copy merged
Now paste that just above your bottom raster 1 layer
Line it up correctly by using mover tool if it did not line up
under selections tab do all of the following..
A. select all,
B. select float.
C. Select defloat.
D modify expand 4
Keep selected.

24. Select background layer choose a color using dropper from image
Flood fill the selection
Selections/select none
Delete the merged layer above background layer you added.


ANIMATION:

1. Select Record 1 layer
Layers palette/right click/duplicate this layer 7 times
You should have 8 records in all.. Close off all of them by clicking eyes in layer palettes
Now Open copy of record one (not original record bottom one)
Image/free rotate 25.00 right close this layer
Open copy 2 free rotate 50.00 right (close layer)
Open copy 3 free rotate 75.00 right (close layer)
Open copy 4 free rotate 100.00 right (close layer)
Open copy 5 free rotate 125.00 right (close layer)
Open copy 6 free rotate 150.00 right (close layer)
Open copy 7 free rotate 175.00 right (close layer)

2. Repeat the above exactly for record 2.

3. Now in Psp starting with the bottom original record 1 and record 2 open both
Edit/copy/copy merged


4. Take it to animation shop right click anywhere paste as new animation

5. In PSP Close original record 1 and 2 by clicking eye
Open copy of record 1 and copy of record 2 Edit/copy/copy merged
Take it to animation shop paste after current frame

6. Continue to do this until you have copied all 8 records (1 and 2) into animation shop. Make sure you always close both previous records and open both new ones. (tip make sure lines on both are facing same way)

8. Save your animation

I hope you enjoy doing my Basic Steps