Showing posts with label MICHAEL LANDEFEL. Show all posts

Friday, November 16, 2012

I'M A COUNTRY GAL


©SassynSimple Tutorials
I’m a Country Gal

Date Written: Nov 16, 2012

PROGRAMS YOU NEED
You are responsible for finding things you need to do this tutorial.
You will need a good working knowledge of the programs I use.
Paintshop or Corel Program 

ITEMS YOU NEED
 Thank all Of you whose items I used to make this tag.
I do appreciate the use of them.

TUBE: Of your Choice one sitting works best, 
 I used the artwork of  Michael Landfeld
You must purchase this tube at CDO.
I have a license for it.
KIT: FTU by Dreamland Designs Autumn Days HERE
MASK: Moonbeams & Spiderweb Mask 45 HERE
FONT: Of your choice

READ BELOW BEFORE STARTING
Settings may differ slightly depending on program you use I use x2
Close original after you copy it unless I state otherwise.
RE-SIZE only one layer and sharpen once if needed
Left click and right click refers to mouse buttons.
Refer to my image for placement of items.

Now Lets Start

1.  Select your Tube and Mask 45 MB and SW minimize them for now

2. Open a new  700x600  transparent image
Selections/select all
Select Paper 5 from the kit edit/copy
Edit/paste into selection on your image
Selections/select none

3.  Layers/new mask layer/from Image
Select Mask 45 MB and SW  in the window
(see other settings below)
Click Ok

4.Layers palette/right click mask/merge/merge group
re-size 105% all layers unchecked, smart size

5.  Select Hay bail from the kit edit/copy
Edit/paste as new layer into your image
Re-size 60%
Move to right side bringing towards the top

6. Effect/3D/Drop Shadow
(see settings below)

7.  Select branch from the kit edit/copy
Edit/paste as new layer into your image
Re-size 20%
Erase the long thin branch sticking out on the right side
(see image below)
Apply same drop shadow
Move to left top should be just above mask

8.  Layers palette/right click branch/duplicate 1 time
Image/mirror
Adjust to make sure it touches outside of mask

9.  Select ladder from the kit edit/copy
Edit/paste as new layer into your image
Re-size 60%
Apply same drop shadow
Move to the side of the hay bail

10.  Select fence from the kit edit/copy
Edit/paste as new layer into your image
Re-size 80%
Apply same drop shadow
Move to the bottom of image keeping centered

11. Select windmill from the kit edit/copy
Edit/paste as new layer into your image
Re-size 25%
Apply same drop shadow
Move to right side of hay bail

12.  Select barrels from the kit edit/copy
Edit/paste as new layer into your image
Re-size 10%
Apply same drop shadow
Move to the right in front of windmill

13. Select birdhouse from the kit edit/copy
Edit/paste as new layer into your image
Re-size 20% and then again 90%
Apply same drop shadow
Move to left side in between fence post 2 and 3

14. Select stone walk way from the kit edit/copy
Edit/paste as new layer into your image
Re-size 20%
Erase the 2 small stones on the left side
Apply same drop shadow
Move to left bottom side stone should touch fence post

15.  Select bench from the kit edit/copy
Edit/paste as new layer into your image
Re-size 55%
Apply same drop shadow
Move to bottom of your image slightly more to the left side
Made need to adjust after adding your tube

16. Select your tube edit/copy
Edit/paste as new layer into your image
Re-size as needed, I re-sized mine 80%
Apply same drop shadow
Move it so that it is sitting on the bench

17. Select branches from the kit edit/copy
Edit/paste as new layer into your image
Re-size 15%
Apply same drop shadow
Move to right bottom side of image

18. Layers palette/right click branch/duplicate 1 time
Image/mirror
Adjust if needed

19. Select spray from the kit edit/copy
Edit/paste as new layer into your image
Re-size 45%
Apply same drop shadow
Move to right side on top of branches

20. Layers palette/right click branch/duplicate 1 time
Image/mirror

21. Add any text that you wish to

22. Re-size your image if you wish to all layers Smart Size.
I re-sized mine 550 in width height will adjust

23, Add a New Layer apply copyrights and watermark
Once you added this save your image in png format

Thanks Marsha and Ruth for testing my tutorials.
I appreciate it very much.

When using my tutorials for Stationary
Please add a credit in your footer.
With a link back to where my tutorial is located.

 
©SassynSimple Tutorials

Sunday, March 13, 2011

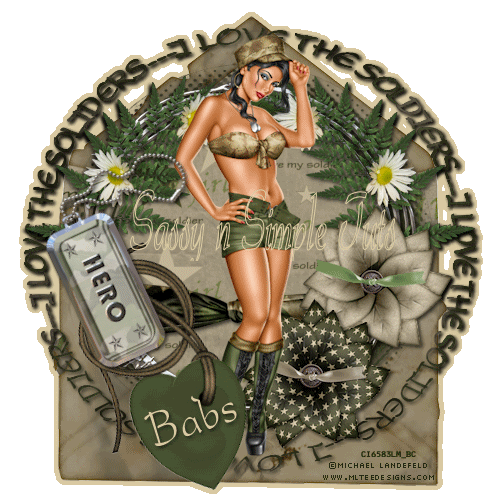
I LOVE MY SOLDIER


I LOVE MY SOLDIER
©SassynSimple Tutorials
Date Written: Nov, 25, 2010

THINGS YOU NEED
PROGRAMS NEEDED
Paintshop Pro or Corel Program
ANIMATION SHOP
Settings may vary depending On your programs version

ITEMS YOU NEED
TUBE: Of your choice I used Michael Landefel PTU I bought it at CILM
I have a license for this tube
KIT: Sky Scraps FTU Tagger Camo HERE
FONT: Of Your Choice
MASK: My sns_mask03_ILTS HERE


READ BELOW BEFORE STARTING
Settings may differ slightly depending on your version.
Close original after you copy it unless I state otherwise.
Sharpen all re-sized items 1 time.
RE-SIZE only one layer unless other wise stated.
Refer to my image for placement of items.
Left click and right click refers to mouse buttons.

Now Lets Start

1. Open a new transparent Image 500x500
Do not fill

2. 7. Select envelope 1 from the Kit Edit/copy
Edit/paste as new layer into your image
Re-size 80%

3. Effects/3D/ drop shadow settings below


4. Layers Palette/right click raster 2 add a new raster Layer
Selections/Select all
Select Paper 3 from the Kit Edit/copy
Edit/paste into selection
Selections/select none

5. Layers/Add New Mask Layer/from Image settings below
select sns_mask03_ILTS In the window
4. Layers Palette/right click raster 2 add a new raster Layer
Selections/Select all
Select Paper 3 from the Kit Edit/copy
Edit/paste into selection
Selections/select none

5. Layers/Add New Mask Layer/from Image settings below
select sns_mask03_ILTS In the window
6. Layers palette/right click black/white mask
Delete
Would you like this mask merged into layer below YES
Layers palette/right click top mask/ merge/merge group

7. Layers palette/right click mask duplicate 1 time
Right click duplicate layer/merge/merge down
Apply same drop shadow

8. Select frame 1 from the Kit Edit/copy
Edit/paste as new layer into your image
Re-size it 65%
Apply same drop shadow
Move it slightly to the right

9. Select magic wand settings below
Click inside the frame window
Selections/modify/expand 11
Keep selected


10. Layers palette right click mask layer (Group raster)
add a new raster layer
Select paper 15 from the kit Edit/copy
Edit/paste into selection on your image
Selections/select none

11. Select Feulliage 4 from the kit Edit/copy
Edit/paste as new layer above your frame
Re-size it 45%
Apply same drop shadow
Move to top right side of frame

12. Still on Feulliage/layers palette right click/duplicate 1 time
Image/mirror

13. Select knotted ribbon 2 from the Kit Edit/copy
Edit/paste as new layer into your image
Re-size it 50%
Apply same drop shadow
Move it down on frame till the sides are even with the frame sides

14. Select Flower 3 from Kit Edit/copy
Edit/paste as new layer into your image
Re-size it 45%
Apply same drop shadow
Move to right side centered

15. Select Flower 2 from Kit Edit/copy
Edit/paste as new layer into your image
Re-size it 45%
Move it below the other flower

16. Select your tube Edit/copy
Edit/paste as new layer into your image
Re-size as needed I re-sized 85%
Apply same drop shadow
Center in frame

17. Select Heart pendant 2 from the Kit Edit/copy
Edit/paste as new layer into your image
Re-size it 60%
Apply same drop shadow

18. Still on heart pendant
Image/free rotate 15.00 left
Boxes unchecked
Move to left side of your frame heart tie on ribbon

19. Select TagHero from the kit Edit/copy
Edit/paste as new layer into your image
Re-size it 50%
Apply same drop shadow
Place on left side of the frame

20. Still on Tag
Image/free rotate 25.00 left

21. Close off your raster 1 background layer
Layers palette/right click any open layer
Merge/merge visible
Open background layer back up

22. Under your selections tab do the below
A. select all
B. select float
C. Select defloat.
D modify expand 4
Keep Selected

23. Use dropper tool left click select light color from image
Now flood fill the selection on raster 1 background layer
Selections/select none

24. Layers palette right click/merge/merge visible

25. Add Your name now.
Make sure to keep it on the image

26. Apply watermarks and copy right
make sure to keep them on the image

25. Save your image in png form
Or take it to animation shop and save as gift.
I prefer saving mine using animation shop


Thanks for trying my tutorial I hope you enjoyed it.


If You use my tutorials in Stationary Please apply Credit Below

Tutorial by Babs C
HERE

You can copy and paste the above if that does not work use Links below
http://groups.yahoo.com/group/sassynsimple/

I want to thank the Members of SassynSimple Group for testing my Tutorials
I appreciate them helping to make the tutorials mistake free.