Showing posts with label PTU. Show all posts

Thursday, March 15, 2012

HAPPY EASTER YA'LL

©SassynSimple Tutorials

HAPPY EASTER YA’LL
 Date Written: March 14, 2011


PROGRAMS YOU NEED
You are responsible for finding things you need to do this tutorial.
You will need a good working knowledge of the programs I use.
Paintshop 12 and Older or Corel Program 
PLUGINS
ANIMATION SHOP

ITEMS YOU NEED
 Thank all Of you whose items I used to make this tag.
I do appreciate the use of them.

TUBE: Of your Choice I used the lovely artwork of PinUpToons
Which you must buy HERE I have a license for this tube
KIT: DNS SCRAPS PTU Lunny Bunny Buy it HERE
MASK: My BBD 2011 MASK 69 HERE
FONT: Of your choice

READ BELOW BEFORE STARTING
Settings may differ slightly depending on program you use I use x2
Close original after you copy it unless I state otherwise.
RE-SIZE only one layer and sharpen once if needed
Left click and right click refers to mouse buttons.
Refer to my image for placement of items.

Now Lets Start

1.  Select your Tube and mask minimize them for now

2. Open a new 600x600  transparent image
Selections/select all
Select Paper 14 from the kit edit/copy
Edit/paste into selection on you image
Selections/select none

3.  Layers/new mask layer/from Image
Select : BBD 2011 MASK 69  in the window
(see other settings below)
Click Ok
Layers palette/right click mask/merge/merge group
Now re-size mask 110
4. Effect/3D/Drop Shadow
(see settings below)
Click OK

5.  Select bubble 2 from the kit edit/copy
Edit/paste as new layer into your image
Re-size 80%
Apply same drop shadow

6. Select tree 2 from the kit edit/copy
Edit/paste as new layer into your image
Re-size 65%
Apply same drop shadow
Move to right side of bubble

7. Select your tube edit/copy
Edit/paste as new layer into your image
Re-size as needed, I re-sized 85%
Apply same drop shadow
Move down slightly

8.  Select ballons 3 from the kit edit/copy
Edit/paste as new layer into your image
Re-size 60%
Apply same drop shadow
Move to bottom left side of bubble

9.  Select mushroon (3 blue ones)  from the kit edit/copy
Edit/paste as new layer into your image
Re-size 40%
Apply same drop shadow
Move in front of the tree

10.   Select cute bunny 2 from the kit edit/copy
Edit/paste as new layer into your image
Re-size 45%
Apply same drop shadow
Move to bottom left side of bubble

11.  Select egg 2 from the kit edit/copy
Edit/paste as new layer into your image
Re-size 20%
Apply same drop shadow
Move to bottom right side of image

12. Select egg 3 from the kit edit/copy
Edit/paste as new layer into your image
Re-size 20%
Apply same drop shadow
Move next to other egg

13.  Now add any text you would like to.

14.  I re-sized my image 550x550 but if you prefer not that is fine

15.  Add a new raster layer and apply copyrights and your watermark

16. Save the image in png format.

Thanks for trying my tutorial I hope you enjoyed it.

I want to thank Marsha and Ruth for testing my tutorials

If You use my tutorials in Stationary Please apply a credit in your footer
with  a link back to where my tutorial is located.

I now put all my stationary tutorials in Incredimail letter form
you have to join my group to access them HERE or Wait till I add some new ones to my blog
we also offer weekly challenges

©SassynSimple Tutorials

Wednesday, February 15, 2012

SWEET BABY_ TUT 93

©SassynSimple Tutorials
SWEET BABY
Date Written: Feb 15, 2012


PROGRAMS YOU NEED
You are responsible for finding things you need to do this tutorial.
You will need a good working knowledge of the programs I use.
Paintshop or Corel Program 

ITEMS YOU NEED
 Thank all Of you whose items I used to make this tag.
I do appreciate the use of them.

TUBE: Of your Choice I used Barbara Jensen's beautiful artwork
You must purchase it HERE
 I have a license for this tube
KIT: Cindys Creative Designs Pink Doll PTU you can get it HERE
MASK: Bitzy Beez Designz Mask bbd_2011 Mask 93 HERE
FONT: Of your choice

READ BELOW BEFORE STARTING
Settings may differ slightly depending on program you use I use x2
Close original after you copy it unless I state otherwise.
RE-SIZE only one layer and sharpen once if needed
Left click and right click refers to mouse buttons.
Refer to my image for placement of items.

Now Lets Start

1.  Select your Tube and mask  minimize them for now

2. Open a new 600x600 transparent image
Selections/select all
Select paper 1 from the kit edit/copy
Edit/paste into selection on your image
Selections/select none

3. Layers/new mask layer/from image
Select BBD 2011 Mask 93 in the window
(mask settings below)
Click OK
Layers palette/right click mask/merge/merge group


4.  Select wreath 2 from the kit edit/copy
Edit/paste as new layer into your image
Re-size it 80%
Apply drop shadow
(settings below)
5.  Select frame 3 from the kit edit/copy
Edit/paste as new layer into your image
Re-size it 70%
Apply same drop shadow

6.  Using free hand tool select around the frame
Start at top left corner going around till you meet back at it
(see image below)
Keep Selected 


7.  Layers palette/right click wreath layer/add a new raster layer
Select paper 8 from the kid edit/copy
Edit/paste as new layer into your image
Selections/select none

8.  Layers palette/right click frame layer/merge/merge down
Image/free rotate 15.00 left boxes unchecked

9.  Pull up your tube Edit/copy
Edit/paste as new layer into your image
Re-size if needed, I did not re-size
Erase any part of the tube that is below the frame bottom
Apply drop shadow

10.  Select danglie 2 from kit edit/copy
Edit/paste as new layer into image
Re-size it 55%
Apply drop shadow
Move to top right side of frame

11.  Select Light 1 from the kit edit/copy
Edit/paste as new layer into your image
Re-size it 40%
Apply same drop shadow
Move to top left side of frame

12. Select bird 1 from the kit Edit/copy
Edit/paste as new layer into your image
Re-size it 30%
Apply same drop shadow
Move to bottom left side of frame

13. Select branch 3 from the kit edit/copy
Edit/paste as new layer into image
Re-size it 70%
Erase the excess stem
Do not apply drop shadow yet

14.  Layers palette/right click branch/duplicate 1 time
Image/mirror
Image/free rotate 30.00 left
Layers/palette/right click/merge/merge down
Now apply drop shadow

15.  Select bow 3 from the kit edit/copy
Edit/paste as new layer into your image
Re-size it 55%
Image/flip
Apply same drop shadow
Move to top right side of frame

16.  Apply any text you would like at this time

17. Re-size your image if desired I re-sized mine to 500x500
All layers smart size
I always crop off excess around my image

18. Add a new raster layer apply copyrights and watermarks
Layers palette/right click/merge/merge visible

19. Save your image in png format

Thanks for trying my tutorial I hope you enjoyed it.

I want to thank Marsha and Ruth for testing my tutorials

If You use my tutorials in Stationary Please apply a credit in your footer
with  a link back to where my tutorial is located.

I now put all my stationary tutorials in Incredimail letter form
you have to join my group to access them HERE
we also offer weekly challenges
Would you like to test for me?
apply HERE
(tester must read and do tutorials as written)


©SassynSimple Tutorials

Saturday, December 17, 2011

I LOVE DECORATING

©SassynSimple Tutorials
I LOVE DECORATING
WRITTEN: Dec 17, 2011


PROGRAMS YOU NEED
You are responsible for finding things you need to do this tutorial.
You will need a good working knowledge of the programs I use.
Paintshop or Corel Program

ITEMS YOU NEED
Thank all Of you whose items I used to make this tag and Tutorial.
I do appreciate the use of them.

TUBE: Of your Choice I used the beautiful artwork of Elias Chatzoudis
I have a license for this tubeYou can purchase it at PTE
KIT: Jens Sweet Temptations PTU Season of Giving HERE
MASK: BBD_2011 Christmas mask O2 at the bottom of tutorial
FONT: Of your choice

READ BELOW BEFORE STARTING
Settings may differ slightly depending on program you use I use x2
Close original after you copy it unless I state otherwise.
RE-SIZE only one layer and sharpen once if needed
Left click and right click refers to mouse buttons.
Refer to my image for placement of items.

Now Lets Start

1. Select your Tube and mask minimize them for now.

2. Open a new transparent image 600x600
Selections/select all
Select paper 9 from the kit edit/copy
Edit/paste into selection on your image
Selections/select none

3. Layers/new mask layer/from image
Select BBD_2011Christmas Mask_02 in the window
(settings Below)
click OK
Layers palette/right click mask/merge/merge group

Align Center4. Select Frame 1 from the kit Edit/copy
Edit/paste as new layer into your image
Do not re-size

5. Effects/3D/Drop shadow
(settings below)
6. Using magic wand click inside the frame
(wand settings below)
Selections/modify expand 10


7. Layers palette right click on mask layer/add new raster layer
Select paper 10 from the kit edit/copy
Edit/paste into selection on you image
Selections/select none

8. Select Limb 1 from the kit edit/copy
Edit/paste as new layer into your image
Re-size 50%
Image/flip
Apply same drop shadow
Move to top left corner of frame

9. Select Limb 2 from the kit edit/copy
Edit/paste as new layer into your image
Re-size 50%
Apply same drop shadow
Move to top left corner of frame

10. Select bells from the kit edit/copy
Edit/paste as new layer into your image
Re-size 70%
Image/free rotate 20.00 right boxes unchecked
Adjust/sharpen
Apply same drop shadow
Move to top left corner of frame

11. Select Ornament 1 from the kit edit/copy
Edit/paste as new layer into your image
Re-size 35%
Apply same drop shadow
Move to top left corner of frame

12. Select Sign 1 from the kit edit/copy
Edit/paste as new layer into image
Re-size 70%
Move to top right side of frame

13. Select Tree 1 from the kit Edit/copy
Edit/paste as new layer into your image
Do not re-size
Apply same drop shadow
Move slightly to right

14. Select Gifts from the kit edit/copy
Edit/paste as new layer into image
Re-size 50%
Apply same drop shadow
Move to right side of tree

14. Select your tube Edit/copy
Edit/paste as new layer into your image
Re-size as needed, I re-sized 80%
Apply same drop shadow
Place slightly to the left of center

15. Select Ornament 6 from the kit edit/copy
Edit/paste as new layer into your image
Re-size 35%
Apply same drop shadow
Move to the left bottom corner of frame

16. Re-size your image all layers if you want to.

17. Apply your text at this time

18. Add a new raster layer apply credits and watermarks

19. Layers palette/right click any layer/merge/merge visible

20. Save you image in png form

Thanks for trying my tutorial I hope you enjoyed it.

MASK FOR THIS TUTORIAL
BBD_2011 Christmas Mask 02
Just right click choose save image as

I want to thank Marsha and Ruth for testing my tutorials

If You use my tutorials in Stationary Please apply a credit in your footer
with a link back to where my tutorial is located.

I now put all my stationary tutorials in Incredimail letter form
you have to join my group to access them HERE
we also offer weekly challenges

©SassynSimple Tutorials


Friday, November 25, 2011

Seasons Greetings Good Tidings

©SassynSimple Tutorials
Date Written: Nov 25, 2011
Seasons Greetings Good Tidings


PROGRAMS YOU NEED
You are responsible for finding things you need to do this tutorial.
You will need a good working knowledge of the programs I use.
Paintshop or Corel Program

ITEMS YOU NEED
Thank all Of you whose items I used to make this tag.
I do appreciate the use of them.

TUBE: Of your Choice I used the lovely artwork of Pinuptoons, you must it at CDO
I have a license for it
KIT: Freek’s Creations Good Tidings PTU at T
KO
MASK: Babs Bitzy Beez Desginz 2011 Mask 83 added to bottom of tutorial
FONT: Of your choice

READ BELOW BEFORE STARTING
Settings may differ slightly depending on Program and Kit used
Close original after you copy it unless I state otherwise.
RE-SIZE only one layer and sharpen once if needed
Left click and right click refers to mouse buttons.
Refer to my image for placement of i
tems.

Now Lets Start

1. Select your Tube and the BBD 2011 Mask 83 minimize them for now

2. Open a new 700x700 transparent image. We
Will re-size later.
Selections/select all
Select paper 3 from the kit Edit/copy
Edit/paste into selection
Selections/select none

3. Layers/new mask layer/from image
(settings Below)
Select the mask in the window
Click ok
Layer palette right click mask/merge/merge g
roup


4. Effects/3D/Drop Shadow
(settings Below)


5. Select E40 frame Edit/copy
Edit/paste as new layer into your image
Re-size it %85
Apply same drop shadow

6. Select your selection tool
(settings below)
Drop out a square (see image below)
Keep selected


7. Layer palette/right click group raster2/add a new raster layer
Select paper 5 Edit/copy
Edit paste into selection on your image
Selections/select none

8. Select E22 Christmas tree edit/copy
Edit/paste as new layer above frame layer
Do not re-size
Apply same drop shadow
Move to the left side of frame

9. Select E33 snow from the kit edit/copy
Edit/paste as new layer into your image
Re-size %90
Apply same drop shadow
Move to the bottom of your image

10. Select your tube edit/copy
Edit/paste as new layer into your image
Re-size if needed I did not re-size
Apply same drop shadow
Tube should be centered in frame
I mirrored mine

11. Select Element 18 snowman from the kit edit/copy
Edit/paste as new layer into your image
Re-size %50

12. Select element 14 seasons greetings sign from the kit edit/copy
Edit/paste as new layer into your image
No re-size
Apply same drop shadow
Move to the right side of your frame

13. Select E17 Santa sleigh from the kit edit/copy
Edit/paste as new layer into your image
Re-size 90%
Apply same drop shadow
Move to the bottom onto the snow

14. At this time I re-sized all layer smart size to 500x500

15. Apply any text that you would like

16. Add a new raster layer apply copyrights and watermark
Layers palette/right click merge visible
Save your image in png format


Thanks for trying my tutorial I hope you enjoyed it.

I want to thank Marsha and Ruth for testing my tutorials

If You use my tutorials in Stationary Please apply a credit in your footer
with a link back to where my tutorial is located.

I now put all my stationary tutorials in Incredimail letter form
you have to join my group to access them HERE
we also offer weekly challenges

©SassynSimple Tutorials

BBD_2011 MASK 83

Sunday, June 19, 2011

I LOVE ROCK N ROLL

©SassynSimple Tutorials

I LOVE ROCK N ROLL
Date Written: June 19, 2011
PROGRAMS YOU NEED
You are responsible for finding things need to do this tutorial.
You will need a good working knowledge of the programs I use.
Paintshop or Corel Program

ITEMS YOU NEED
TUBE: Of your Choice I used Keith Garvey I have a license for this tube,
You will need to purchase this tube at PTE
KIT: Sweet Cravings Scraps PTU Tagger Route 66 you will find the Kit at TKO
MASK: I am using one I made BBD_ 2011_Mask 50 HERE
FONT: Of your choice

READ BELOW BEFORE STARTING
Settings may differ slightly depending on Program and Kit used
Close original after you copy it unless I state otherwise.
RE-SIZE only one layer and sharpen once if needed
Left click and right click refers to mouse buttons.
Refer to my image for placement of items.

Now Lets Start

1. Select your Tube and Mask of choice minimize them for now for now

2. Open a new transparent image 700x600
We will re-size later
Selections/select all
Select paper 1 from the kit Edit/copy
Edit/paste into selection on your image
Keep selected
If you prefer no background then to not fill raster 1

3. Layers palette/right click add a new raster layer
Select paper 12 from the kit edit/copy
Edit/paste into selection on your image
Selections/select none

4. Layers/new mask layer/from image
Select BBD_2011_Mask50 in the window
(Settings below)
Click Ok
Layers palette/right click black/white mask/merge/merge group
Re-size the mask 107%

5. Effects/3D/Drop Shadow
(settings below)
6. Select Frame 5 from the kit Edit/copy
Edit/paste as new layer into image
Re-size it 65%
Apply same drop shadow

7. Select Record 1, 2, 3 Edit/copy
Edit/paste each one as new layer into image
Re-size them 35%
Apply same drop shadow to each one
Move them to right bottom side of frame

8. Select diner sign 2 from the kit edit/copy
Edit/paste as new layer into image
Re-size 35%
Apply same drop shadow
Image/free rotate 20.00 left boxes unchecked
Move to left top side of frame

9. Select the jukebox from the kit Edit/copy
Edit/paste as new layer into your image
Re-size it 50%
Apply same drop shadow
Image/free rotate 20.00 left boxes unchecked
Move to bottom left side of frame

10. Select your tube edit/copy
Edit/paste as new layer into your image
Re-size as needed. I re-sized 80%
Apply same drop shadow

11. Select the MusicNotes from the kit edit/copy
Edit/paste as new layer into the image
Re-size 65%
Apply same drop shadow
Move to bottom of frame

12. Select ribbon 2 and 3 from the kit edit/copy each one
Edit/paste each one as new layer into image
Re-size Blue ribbon it 80 %
Re-size red ribbon 75%
Apply same drop shadow
Move to bottom of frame

13. Select milkshake 1 from the kit Edit/copy
Edit/paste as new layer into image
Re-size 50%
Image/free rotate 20.00 right boxes unchecked
Apply same drop shadow
Move to right bottom side of frame

14. Select the Guitar from the kit edit/copy
Edit/paste as new layer into image
Re-size it 70%
Image/free rotate 70.00 left boxes unchecked
Apply same drop shadow
Place at bottom center of frame

15. Apply your text now.

16. Use crop tool to crop close in around items
Leave room to apply copyrights and water mark

17. Now re-size your image to desired size.
I re-sized my width to 500

18. Save your image in preferred format.

Thanks for trying my tutorial I hope you enjoyed it.

I want to thank Marsha and Ruth for testing my tutorials.

If You use my tutorials for Stationary Please apply a credit in your footer
with a link back to where my tutorial is located.


I now put all my stationary tutorials in Incredimail letter form
you have to join my group to access them HERE
we also offer weekly challenges


©SassynSimple Tutorials


Tuesday, May 17, 2011

DON'T BITCH

©SassynSimple Tutorials


Date Written: May 17. 2011

PROGRAMS YOU NEED
You are responsible for finding things need to do this tutorial.
You will need a good working knowledge of the programs I use.
Paintshop or Corel Program

ITEMS YOU NEED
TUBE: Of your Choice I used Keith Garvey a PTU tube get it at PTE
I have a license for this tube
KIT: Linda’s Dream Design Simply Romantic PTU Here
MASK: Misfits Blog Myth Mask 37 HERE
FONT: Of your choice

READ BELOW BEFORE STARTING
Settings may differ slightly depending on Program and Kit used
Close original after you copy it unless I state otherwise.
RE-SIZE only one layer and sharpen once if needed
Left click and right click refers to mouse buttons.
Refer to my image for placement of items.

Now Lets Start

1. Select your Tube and mask minimize them for now

2. Open a new transparent image 600x500
Selections/Select all
Select Paper 13 from the Kit Edit/copy
Edit/paste into selection on your image
Selections/select none
Layers palette/right click raster 1 duplicate 1 time
Image/mirror
Take opacity down to 50%

3 Layers palette/right click raster 2/add new raster layer
Selections/select all
Select paper 5 from the kit edit/copy
Edit/paste into selection on your image
Selections/select none

4. Layers/New Mask Layer/From Image
Selec Myth Mask 37 in window
(settings below)
Layers palette/right click black/white mask/merge/merge group
5. Select the greenry from the kit Edit/copy
Edit/paste as new layer into image
Re-size it 60%
Move to left side of image

5. Effects/3D/Drop Shadow
(settings below)

6. Layers/palette right click greenry layer/duplicate 1 time
Image/mirror

7. Select frame 3 from the kit edit/copy
Edit/paste as new layer into image
Re-size it 80%
Apply same drop shadow
Use eraser tool and remove the ribbons that are hanging down
Move the frame to the center of mask

8. Select your tube Edit/copy
Edit/past as new layer into your image
Re-size as needed I re-sized 70%
Apply same drop shadow
Place in center of frame

9. Select pink floral 1 from the kit edit/copy
Edit/paste as new layer into your image
Re-size it 50%
Apply same drop shadow
Move to Left side of frame
Layers palette/right click duplicate 1 time
Image/mirror

10. Select white carnation from the kit edit/copy
Edit/paste as new layer into your image
Re-size it 40%
Apply same drops shadow
Center between pink florals

11. Select the candle from the kit edit/copy
Edit/paste as new layer into your image
Re-size it 35%
Move to left side of frame

12. Select the champagne from the kit edit/copy
Edit/paste as new layer into your image
Re-size it 65%
Apply same drop shadow
Move to bottom right side of frame

13. Select the champagne glass from the kit edit/copy
Edit/paste as new layer into your image
Re-size it 20%
Apply same drop shadow
Move to bottom right side of champagne

14. Add your text at this time

15. Re-size your image
I re-sized to 475 width all layers smart size, height will adjust

16. Add a new raster layer add your copyrights and watermark

17. Layers palette/right click any layer/merge/merge visible.
I also cropped close around my image.
Save your image in jpeg form.


Thanks for trying my tutorial I hope you enjoyed it.

I want to thank Linda, Marsha and Ruth for testing my tutorials.

I now put all my stationary tutorials in Incredimail letter form
you have to join my group to access them HERE
we also offer weekly challenges

If You use my tutorials in Stationary Please apply Credit


Saturday, April 30, 2011

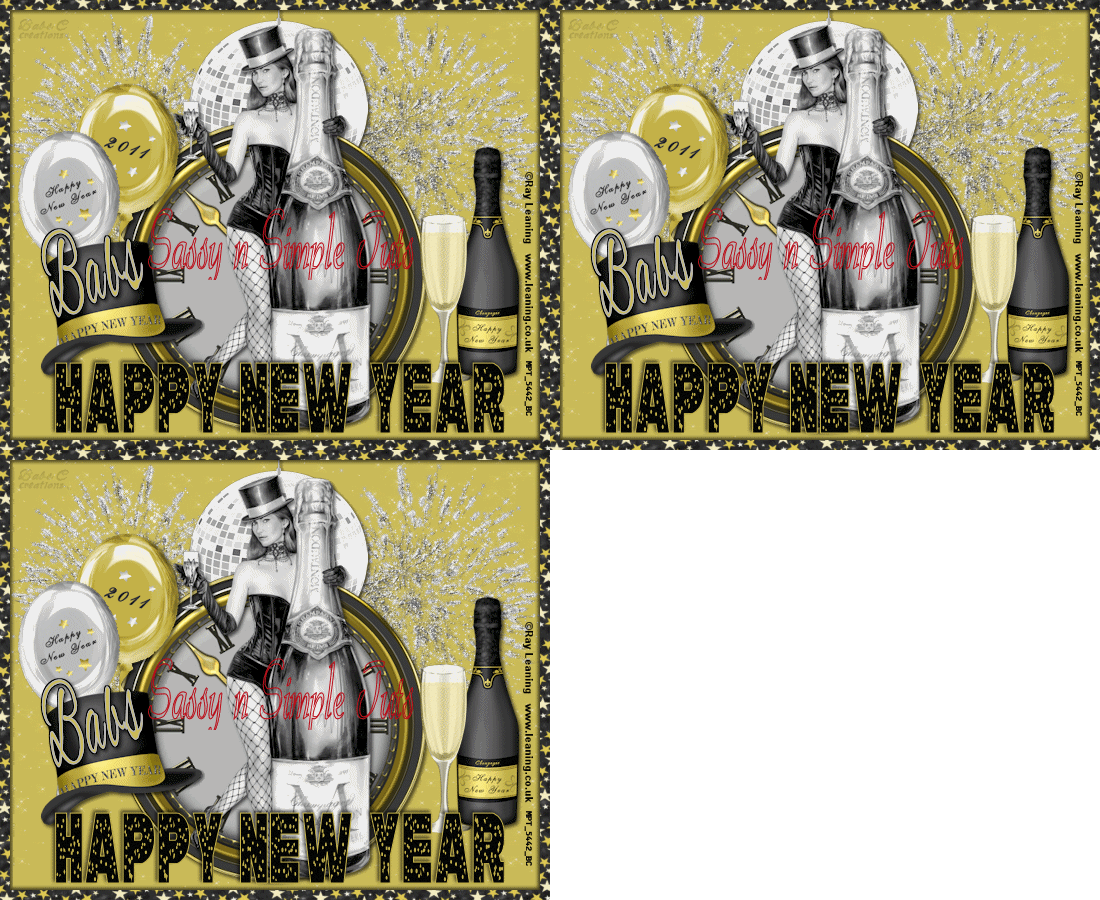
2011 HAPPY NEW YEARS


©SassynSimple Tutorials
Date Written: Dec 31, 2010

PROGRAMS NEEDED
Paintshop or Corel Program
PLUGINS Xenoflex 2 constellations
ANIMATION SHOP

ITEMS YOU NEED

TUBE: of your I used Ray Leaning PTU I bought it at MPT
I have a license for this tube
KIT: Scrap and Tubes PTU Kit HERE
FONT: Of your choice I used Galaxy 1 FTU at 1,000 fonts

READ BELOW BEFORE STARTING
Settings may differ slightly depending on your version.
Close original after you copy it unless I state otherwise.
Sharpen all re-sized items 1 time.
RE-SIZE only one layer unless other wise stated.
Refer to my image for placement of items.
Left click and right click refers to mouse buttons.

Now Lets Start

1. Select your Tube minimize it for now

2. Open a new transparent image 550x450
Selections/Select all
Keep selected

3. Select Paper 5 from Kit Edit/copy
Edit/paste into selection on your image
Selections/select none

4. Select fireworks 2 from kit Edit/copy
Edit/paste as new layer into image
Re-size 50%
Move to top right side
leave room on side and top for border

5. Still on fire works
Layers palette/right click duplicate 1 time
Image/mirror
Right click duplicate/merge/merge down
Do not add drop shadow

6. Select Disco ball from kit Edit/copy
Edit/paste as new layer into image
Re-size it 50%
Center it in image

7. Still on disco ball
Effects/3D/drop shadow
Settings/below


9. Select clock from the kit Edit/copy
Edit/paste as new layer into your image
Re-size it 85%
Apply same drop shadow
Center it image

10. Select your Tube Edit/copy
Edit/paste as new layer into your image
Re-size as needed I re-sized 80%
Apply same drop shadow
Center in it in the clock

11. Select bottle of champagne from kit
Edit/copy
Edit/paste as new layer into your image
Re-size it 45%
Apply same drop shadow
Move to right bottom side of clock

12. Select the champagne glass
Edit/copy
Edit/paste as new layer into your image
Re-size it 45%
Apply same drop shadow
place it next to champagne bottle

13. Select balloon 1 from Kit
Edit/copy
Edit/paste as new layer into your image
Re-size it 45%
Apply same drop shadow
Move to right side of clock

14. Select balloon 2 from Kit
Edit/copy
Edit/paste as new layer into your image
Re-size it 45%
Apply same drop shadow
Move below other balloon

15. Select hat 1 from Kit
Edit/copy
Edit/paste as new layer into your image
Re-size it 45%
Apply same drop shadow
Move below the balloons

16. Layers palette right click merged layer
Add new raster layer
Selections/select all

17. Select paper 3 from kit Edit/copy
Edit/paste into selection
Selections/modify/contract 10
Hit delete on your keyboard
Or edit/clear
Selections/select none

18. Apply same drop shadow
Go back apply drop shadow again
But change horizontal and vertical to -2

19. Add your text now.
I used Galaxy 1 font ftu at 1,000 fonts
Gold foreground color/black background color

20. Add new raster layers apply copyrights and watermarks

21. Close off raster 1 and raster 2 by clicking eye
Layers palette right click any layer merge/merge visible
You should have 3 layers now
merged Layer
fireworks raster 2 layer
and background raster 1 layer

22. Open back up all your layers
You can save as jpeg or go on to animation

ANIMATION
Open your animation shop minimize for now

1. In psp right click raster 2 (fireworks) Layer
Duplicate 2 times for a total of 3 layers

2. Starting with copy 2 of raster 2 (top) layer
Effects/plugins/Xenoflex 2 constellations
Settings below
After applying click eye close off this layer

3. Select copy of raster 2 (middle layer)
Apply constellations again hit random seed button 1 time
After applying Click the eye and close of this layer

4. Select raster 2 bottom layer
Apply constellations again hit the random seed button 1 time
do not close this layer

5. Edit/copy/copy merged
Take it to Animation Shop
Right click anywhere in workspace paste as new animation

6. Back in PSP click eye close raster 2
Click eye and open copy of raster 2 (middle layer)
Edit/copy/copy merged
Take it to animation shop
Right click first frame paste after current layer

7. Back in PSP click eye close copy of raster 2
Click eye and open copy 2 of raster 2( top layer)
Edit/copy/copy merged
Take it to animation shop
Right click first frame paste after current layer

8. Save your animation I did not change display time

Below is an example of a Background that can be
Made if you would like to make this into a stat.

Thanks for trying my tutorial I hope you enjoyed it.

If You use my tutorials in Stationary Please apply Credit
I really want to thank my Sassy n Simple Group Testers for helping test
This and make it mistake free. They do a wonderful job testing my tutorials.
Marsha
Melody
Linda
Ruth

I now put my Stationary tutorials in Incredimail Letter Form
These can only be accessed by joining My groups below
SassynSimple
Closed to Testers Only
Our PSP Hideaways
Public group hosting weekly challenges 

Wednesday, November 10, 2010

PUNK


©Sassy n Simple
PUNK


Date Written: Nov, 9. 2010
PROGRAMS NEEDED
Paintshop or Corel Program

You will need a good working knowledge of the program.

OTHER ITEMS NEEDED
TUBE: Angie Monasterio is PTU you need to buy it CILM
I have a license to use this tube
KIT: Zaza Scrap and Tubes PTU Tagger kit PUNK you will find it at TKO
FONT: Of Your Choice I use a FTU Chinacat from DaFont HERE
MASK: SDTMASK_202 HERE page 9


READ BELOW BEFORE STARTING
Settings may differ slightly depending on your version.
Close original after you copy it unless I state otherwise.
Sharpen all re-sized items 1 time.
RE-SIZE only one layer unless other wise stated.
Refer to my image for placement of items.
Left click and right click refers to mouse buttons.

Now You can Jump In

First open your tube and mask minimize them for now

1. Open a new transparent Image 600x500
Selections/select all
Select paper 4 from the kit Edit/copy
Edit/paste into selection on your image
Keep Selected

2. Layers palette/right Click Raster 1 /add a new raster layer
Select Paper 3 from the Kit Edit/copy
Edit/paste into selection on you image
Selections/none
3. Layers/New Mask Layer/from Image (settings below)
Select SDTMASK202 in the window


4. Layers palette/right click black/white mask
Delete
Would you like this mask merged into layer below YES
Layers palette/right click top mask/ merge/merge group
Re-size 90%

5. Select Frame 4 from the Kit Edit/copy
Edit/paste as new layer into your image
Re-size it 70%
Image/free rotate 90.00 left all boxes unchecked
6. Effects/3D/drop shadow (settings below)
7. Select your rectangle tool (settings below)
Starting in top left corner stay on frame right at edge
Draw rectangle out to bottom right corner
Keep selected

8. Layers palette/right click on group raster 2 layer/ add a new layer
Select the color black in foreground color
Flood fill the selection
Selections/select none

7. Layers palette/right click frame Layer/merge/merge visible

8. Select Eyelet 1 from the kit Edit/copy
Edit/paste as new layer into your image
Re-size it 50%
Apply same drops shadow
Move to left side of frame

9. Layers palette/right click eyelet/duplicate 1 time
Image/mirror

10. Select Charm 1 from kit Edit/copy
Edit/paste as new layer into image
No re-size
Apply same drop shadow
Place center at top of frame

11. Select your tube Edit/copy
Edit/paste as new layer into image
Re-size as needed I re-sized 75%
Apply same drop shadow
Move it to the left side of frame

12. Select Tag from the kit Edit/copy
Edit/paste as new layer into your image
Re-size it 70%
Apply same drop shadow
Image/free rotate 10.00 Left same settings

13. Select Brad 3 from Kit Edit/copy
Edit/paste as new layer into image
No re-size
Apply same drop shadow
Place on right bottom corner of frame

14. Select Brad 2 from Kit Edit/copy
Edit/paste as new layer into image
No-re-size
Apply same drop shadow
Place on right bottom corner of frame

15. Select the lips from Kit Edit/copy
Edit/paste as new layer into image
Re-size 85%
Apply same drop shadow
Move to center of frame

16. Layers palette/right click /add a new raster layer
Selections/select all
Select paper 1 from Kit Edit/copy
Edit/paste into selection on your image
Selections/modify/contract 15
Hit delete or Clear under edit
Selections/select none

17. Adjust eyelets if they are behind the frame

18. Re-size your image all layers smart size so width is 500

19. Add your text and name at this time

20. Add your copyrights and watermark.

21. Save your image as a jpeg.

Thanks for trying my tutorial I hope you enjoyed it.

Please if you use it to make a stat apply below credit in your footer

Tutorial by: ©Sassy n Simple
HERE 

You can copy and paste it
But if that does not work links are below
http://groups.yahoo.com/group/sassynsimple/


I would Like to Thank the Sassy n Simple
Testers for testing my tutorial for me.


Tuesday, October 19, 2010

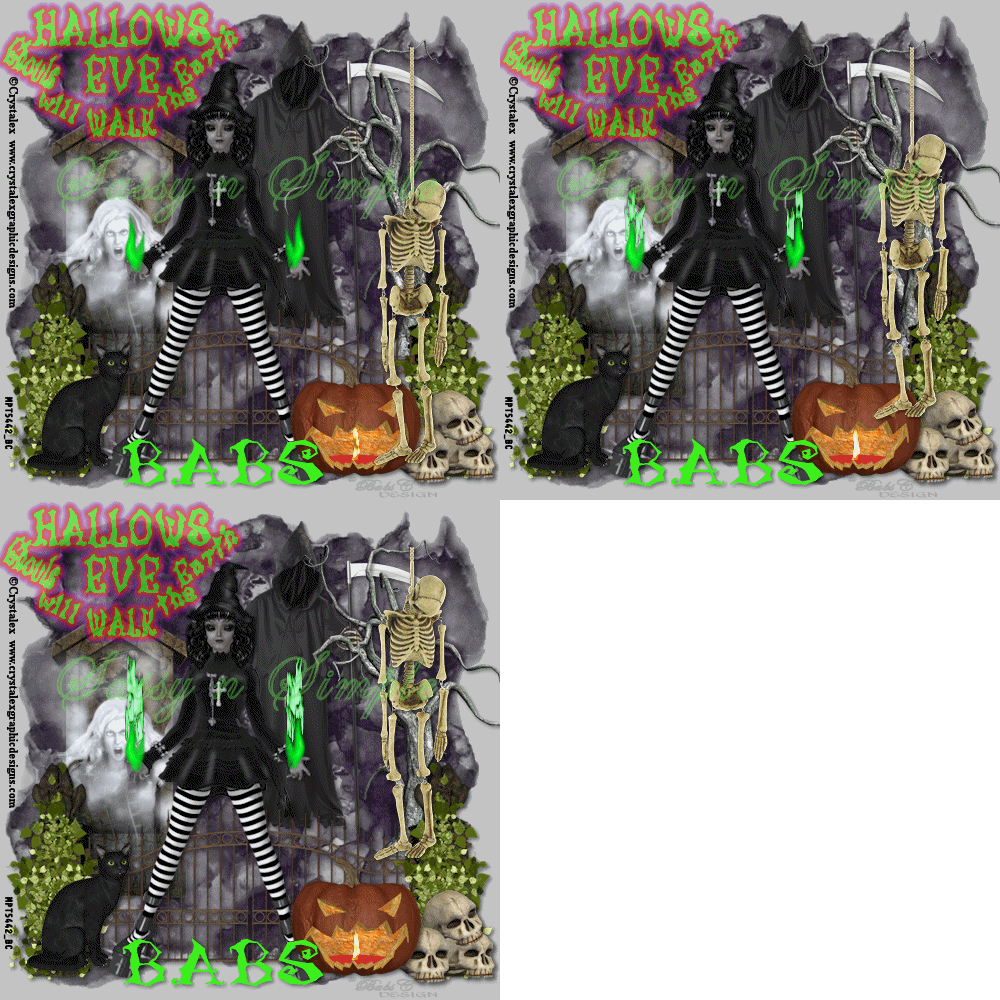
HALLOWES EVE

©Sassy n Simple Date
HALLOWS EVE
Written: Oct 10, 2010

THINGS YOU NEED
It is your responsibility to have or get the programs that are needed.
Paintshop or Corel Program
ANIMATION SHOP

PLUGIN: Eye Candy 5 Impact Gradient Glow demo HERE

You will need a good working knowledge of the program.


TUBE: Crystalex is PTU you can get it at MPT
I have a license for this tube

KIT: Designs by Stina PTU you can get it at TKO
FONT: Of your choice I used DaFonts LunacyMore HERE
MASK: Weescotslass Mask_287 HERE included in supplies

My Supplies HERE

READ BELOW BEFORE STARTING
Settings may differ slightly depending on your version.
Close original after you copy it unless I state otherwise.
Sharpen all re-sized items 1 time.
RE-SIZE only one layer unless other wise stated.
Refer to my image for placement of items.
Left click and right click refers to mouse buttons.

Now Lets Start

1. Open a new transparent Image 500x500
Flood fill with a light gray
This is your working image

2. Layers palette/right click/add a new raster layer
Selections/Select all
Select paper 14 from the kit Edit/copy
Edit/paste into selection into your working image
Selections/select none

3. Layers/new mask/from image (settings below)
Select WSL_mask287 in the window
click OK
4. Layers palette/right click black/white mask Delete
Would you like this mask merged into layer below YES
Layers palette/right click top mask/ merge/merge group

5. Select the Graveyardghost01 from kit Edit/copy
Edit/paste as new layer into working image
Re-size it 50%
Move to left side of mask

6. Effects/3D/drop shadow (settings below)


7. Select the GrimReaper from the kit Edit/copy
Edit/paste as new layer into working image
Re-size it 50%
Apply same drop shadow
Move to the top slightly to the right

8. Select Tree 01 from the kit Edit/copy
Edit/paste as new layer into working image
Re-size it 50%
Move to top of right side of mask It is OK if some goes off the mask
Apply same drop shadow.

9. Select the Gate 01 from kit Edit/copy
Edit/paste as new layer into your working image
Re-size it 80%
Apply same drop shadow
Move to bottom of mask center it

10. Select your tube Edit/copy
Edit/paste as new layer into working image
Re-size as needed I re-sized 80%
Apply same drop shadow
Move slightly to the left at bottom of mask

11. Select the Skulls from the kit Edit/copy
Edit/paste as new layer into your working image
Re-size 20%
Apply same drop shadow
Move to right bottom side of image

12. Select the Evil pumpkin from the kit Edit/copy
Edit/paste as new layer into your working image
Re-size 20%
Apply same drop shadow
Move to right side next to skulls

13. . Select the Blackcat 01 from the kit Edit/copy
Edit/paste as new layer into your working image
Re-size 20%
Apply same drop shadow
Move to the left side bottom by gate hedge

14. Select a color in your foreground I used #3bf01c
Layers palette/right click/add a new raster layer
Select the brush I made under your brushes
Apply it by clicking left mouse button..

15. Effects/Eye Candy 5 Impact Gradient Glow
First under settings tab select factory default
( all other settings Below)
Click OK
Layers palette take opacity down 66 or your likening


16. At this time go ahead add copyrights and watermark
Add your name also at this time


17. Layers palette/right click /merge/merge visible


18. Select the SNS_Rope from my supplies

Edit/copy

Edit/paste as new layer into working image

No re-size

Move it to the right so top looks like It is on the tree branch


18. Select the Skeleton O2 from the kit Edit/copy

Edit/paste as new layer into working image

Re-size it 50%

Move it over so that it lined up with the rope


19. Still on skeleton

Layers palette/right click/duplicate 2 times

Close off the top duplicate by clicking eye in layers palette


20. Select copy of raster 2 Layer click on skeleton with mouse

Click on your mover tool click back on skeleton

Now use keyboard move arrows buttons

Use the up arrow move skeleton up so feet

Near the pumpkins eye

Close this layer by clicking eye in layers palette


21. Open copy 2 of raster 2 skeleton

Repeat step 20 for the top skeleton layer

The head should be near the reapers blade

Close this layer by clicking the eye


22. Top and middle skeleton layers should be closed off

Continue to Animation part
or save in jpeg as it is if you do not want to animate it


ANIMATION

Open your animation shop


1. In PsP Edit/copy/merged

Take it to animation shop

Edit Paste as new animation by right clicking in work space


2. Back in PSP close off the bottom raster 2 skeleton

Open copy 2 of skeleton (middle one)

Edit/copy


3. Take it to animation shop

Right click first frame/paste/paste after current frame


4. Back in PSP close off the raster 2 (middle layer)

Open the Top copy 2 of raster 2 Layer

Edit/copy


5. Take it to animation shop

Right click second frame/paste/paste after current frame


6. Edit/select all

Right click first frame change display time to 35 or 40

I used 35


7. File Open

Select the SNS_HE fire from my supplies

Edit/select all

Drag this into your bigger animation

Making sure to place in tubes hands

See step 9 if you mess up placement


8. File Open

Select the SNS_PumpkinFame from my supplies

Edit/select all

Drag this into image place it in the pumpkins mouth

See step 9 if you mess up placement


9. Should you mess up go to edit undo drag

Go back to the fire/flame animation box Edit/undo drag

And try again.


10. Save your animation now.


Thanks for trying my tutorial I hope you enjoyed it.


Please if you use it to make a stat apply below credit in your footer


Tutorial by: ©Sassy n Simple

HERE or HERE

You can copy and paste the above but if does not work links below

http://www.sassynsimple.com/

And to here http://groups.yahoo.com/group/sassynsimple/


©Sassy n Simple

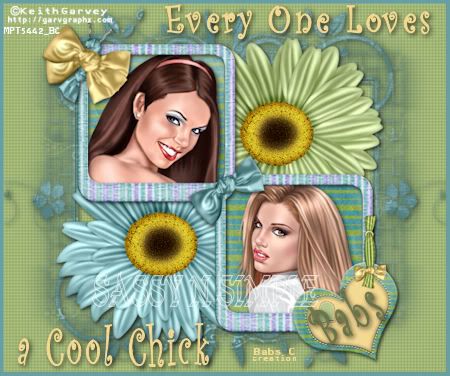
COOL CHICK

©Sassy n Simple
COOL CHICK
Date Written: Aug 28. 2010

THINGS YOU NEED
Paintshop or Corel Program
You will need a good working knowledge of the programs.

TUBE: Keith Garvey you must purchase it he is now at PTE
I have a License mpt5442
KIT: Disyas Digital Designs is PTU HERE
FONT: of your choice
MASK: Sdt_Mask145 HERE
PLUGINS: Penta Dot HERE

READ BELOW BEFORE STARTING
Settings may differ slightly depending on your version.
Close original after you copy it unless I state otherwise.
Sharpen all re-sized items 1 time.
RE-SIZE only one layer unless other wise stated.
Refer to my image for placement of items.
Left click and right click refers to mouse buttons.

Now Lets Start
1. Open The Sdt_Mask145 and your tubes and minimize for now.

2. Open a new transparent Image 600x500
This is your Working image

3. Select Frame Disyas FR 2 from the kit Edit/copy
Edit/paste as new layer into your working image

4. Effects/3D/Drop Shadow (settings below)


5. Select your magic wand (settings below)
Click inside both windows
Selections/modify/expand 12
Keep selected


6. Layers palette/right click on raster 1/add a new raster layer
Select paper 5 from the kit Edit/copy
Edit/paste into selection
Selections/select none

7. Select One of your Tubes Edit/copy
Edit/paste as new layer into working image
Re-size as needed to fit in frame
I re-sized the right one 50%
Apply drop shadow
Move into the right frame
Repeat this for your second tube
I re-sized the left tube 40%

8. Layers palette click the eye on raster 1 to close it
Right click/any open layer/merge/merge visible
Open raster 1 back up

9. Select Flower 2 from the kit Edit/copy
Edit /paste as new layer into working image
Do not re-size
Apply drop shadow
Move it up to the bottom between the two frames

10. Select Flower 3 from the kit Edit/copy
Edit /paste as new layer into working image
Do not re-size
Apply drop shadow
Move it up to the top between the two frames

11. Select Tag 2 from the Kit Edit/copy
Edit/paste as new layer in working image above merged layer
Do not re-size
Apply same drop shadow
Move onto the side of the right bottom frame

12. Select the butterfly 4 from the kit Edit/copy
Edit/paste as new layer into working image
Re-size it 40%
Apply drop shadow
Image/free rotate Right 20.00 uncheck boxes
Move to the top left corner of the top frame

13. Layers palette close raster 1 by clicking the eye
Right click any open layer/merge/merge visible.

14. Right click on raster 1/add a new raster layer
Selections/select all
Keep selected

15. Select paper 8 From the Kit Edit/copy
Edit/paste into selection
Selections/select none

16. Under Layers on your tool bar select new mask layer/from image.
Select the sdtmask145 in the window.
source Luminance is checked and invert mask data is checked
Click OK

17. Layers palette/right click black/white mask
Delete
Would you like this mask merged into layer below YES
Layers palette/right click top mask/ merge/merge group

18. Using dropper tool left click/foreground color
Select the dark green from the flower
Click on raster 1 to select it
Flood fill with foreground color

19. Effects/Plugins/penta color dot (settings below)
Click Apply


20. Layers palette/Right click any layer/merge/merge visible

21. Image add borders 5 symmetric checked
Use dropper tool chose a color from the blue flower

22. Re-size all layers smart size so width is 400 height will adjust

23. Apply Text I figure everyone should know how to do this
With out instructions

24. Apply copyrights and watermarks
Save your image

Thanks for trying my tutorial I hope you enjoyed it.

Please if you use it to make a stat apply below credit in your footer

Tutorial by: ©Sassy n Simple
HERE or HERE
Links to use
http://www.sassynsimple.com/
And to here http://groups.yahoo.com/group/sassynsimple/