Showing posts with label SHAWLI. Show all posts

Thursday, April 5, 2012

SHAWLI HOPPY EASTER

©SassynSimple Tutorials 
SHAWLI HOPPY EASTER
Date Written:  April 5, 2012


PROGRAMS YOU NEED
You are responsible for finding things you need to do this tutorial.
You will need a good working knowledge of the programs I use.
Paintshop or Corel Program 
ITEMS YOU NEED
 Thank all Of you whose items I used to make this tag.
I do appreciate the use of them.

TUBE: Select  1 or 2 tubes Of your Choice
 I used the beautiful artwork of Shawli you must buy it at PTE
 I have a license for this tube
KIT: A Lovely Creative Misfits by Tersea’s  Hoppy Easter HERE
MASK: Of your choice or Mine BBD_2012 Mask 147 HERE
FONT: Of your choice
READ BELOW BEFORE STARTING
Settings may differ slightly depending on program you use I use x2
Close original after you copy it unless I state otherwise.
RE-SIZE only one layer and sharpen once if needed
Left click and right click refers to mouse buttons.
Refer to my image for placement of items.
Now Let’s Get Started


1.  Select your Tube and Mask minimize them for now

2. Open a new  650x600  transparent image
Selections/select all
Select Paper 4 from the kit edit/copy
Edit/paste into selection on you image
Selections/select none

3.  Layers/new mask layer/from Image
Select Mask in the window
(see other settings below)
Click Ok

*** (Note if you use a mask with black background do not invert)

4. Layers palette/right click mask/merge/merge group
Right click/mask layer again/duplicate 1 time
Right click/duplicated mask layer/merge/merge down

5. Effect/3D/Drop Shadow
(see settings below)
Click OK


6.  Select element 1 frame from the kit edit/copy
Edit/paste as new layer into your image
Re-size 70%
Apply drop shadow but change the color to black
Move to  the left side of your image, then move it down some

7.  Select magic wand (settings below)
Click inside the frame window
Selections/modify/expand 12
Keep selected

8.  Layers palette/Right click on Mask layer/add a new raster layer
Select paper 10 Edit/copy
Edit/paste into selection on your image
Selections/select none

9.  Pull up your tube Edit/copy
Edit/paste as new layer into your image
Re-size as needed, I re-sized 85%
Arrange the tube in the frame window like you want
Appy same drop shadow


10. Optional Step
If you want your tube to cover some of the frame
Layers palette/right click/duplicate tube
Right click/arrange/bring it to the top
Now erase any parts you do not want to hide the frame

11.  Layers palette click the eye on your mask layer close it
Right click any open layer/merge/merge visible
Now open your mask layer up

12. Select element 2 frame from the kit edit/copy
Edit/paste as new layer into your image
Re-size 55%
Image/free rotate 10.00 left (boxes not checked)
Apply same drop shadow
Move to top right side of image

13 Using magic wand click inside the frame window
Selections/modify/expand 12
Layers palette right click tube/ frame layer/ add new raster layer
Select paper 12 from the kit edit/copy
Edit/paste into selection on your image
Selections/select none

14. Select your close up tube edit/copy
Edit/paste as new layer into your image
Re-size if needed
Apply same drop shadow
Arrange it in the frame window like you want
Once you are happy with the arrangement
Close your merged tube layer and mask layer
Right click any layer merge/merge visible
This is so you can rearange them later if you need to
Open all layers back up

15. Select element 21 flower from the kit edit/copy
Edit/paste as new layer into your image
Re-size 40%
Apply same drop shadow
Move it the top between the two frames

16.  Select element 20 egg  from the kit edit/copy
Edit/paste as new layer into your image
Re-size 50%
Image/free rotate 10.00 left
Apply same drop shadow
Move to it to the bottom right side of your image

17. Select element 16 egg from the kit edit/copy
Edit/paste as new layer into your image
Re-size 50%
Image/free rotate 10.00 right
Apply same drop shadow
Move to it to the bottom next to the other egg

18. Select element 24 chick egg from the kit edit/copy
Edit/paste as new layer into your image
Re-size 35%
Apply same drop shadow
Move it in front of the other two eggs

19.  At this time add any text that you wish to

20. Re-size your image if you wish to
all layers Smart Size
I re-sized 550 in width height will adjust


21. Add a New Layer apply copyrights and watermark

Save your image in png format (do no use optimizer it will
Put a background into the image

Thanks for trying my tutorial I hope you enjoyed it.

I want to thank Marsha and Ruth for testing my tutorials

Please apply a credit in your footer
With a link back to where my tutorial is located.
GROUPS
http://groups.yahoo.com/group/sassynsimple/
http://groups.yahoo.com/group/ourpsphideaway/
BLOG

http://sassynsimple.blogspot.com/

I now put all my stationary tutorials in Incredimail letter form
you have to join my group to access those
http://groups.yahoo.com/group/ourpsphideaway/


©SassynSimple Tutorials

Wednesday, March 23, 2011

BETTER NOT P0UT

©SassynSimple Tutorials
BETTER NOT POUT
Date Written: Dec 7, 2010

PROGRAMS NEEDED
Paintshop or Corel Program
PLUGINS Vanderlee Snowflakes HERE
ANIMATION SHOP
Settings may vary depending On your programs version

ITEMS YOU NEED

TUBE: of your choice I am using Shawli PTU I bought it at MPT
I have a license for this tube
KIT: Myst Designs Hohoho Blog train FTU full size HERE
FONT: Of your Choice I used Chaucer FTU at A-Z HERE

READ BELOW BEFORE STARTING
Settings may differ slightly depending on your version.
Close original image after you copy unless I state other wise.
Sharpen all re-sized items 1 time
RE-SIZE only one layer unless other wise stated.
Refer to my image for placement of items.
Left click and right click refers to mouse buttons.

Now Lets Start

1. Select your Tube minimize it for now

2. Open a new transparent image 550x550
Selections/select all
Select paper 1
(folder 5) in the kit
Re-size it all layers 25 %
Edit/copy Edit/paste into selection on image
Selections/select none
Do not save changes when you close the paper

3. Select wreath 2 (folder 4) in the kit
Edit/copy
Edit/paste as new layer into your image
Re-size it 15%,

4. Effects/3D/drop shadow
(settings below)
5. Select magic wand tool (settings below)
Click inside of wreath
Selections/modify/expand 15
Keep selected

6. Layers palette right click raster 1/add new raster layer
Select paper 2 (folder 5) in the kit
Re-size it 25% all layers Edit/copy
Edit/paste into selection
Selections/select none
Do not save changes when you close the paper

7. Select your Tube Edit/copy
Edit/paste as new layer into image
Re-size as needed, I re-sized 90%
Apply same drop shadow
Place where you want on wreath

8. Layers palette click eye to close raster 1 layer
Right click any layer/merge/merge visible

7. Select MrClaus (folder 3) in the Kit Edit/copy
Edit/paste as new layer into image above raster 1 layer
Re-size 20%
Apply same drop shadow
Move to top left side of wreath

9. Select Snowy tree (folder 4) in the kit 4 Edit/copy
Edit/paste as new layer in image above Santa Layer
Re-size it 15%
Apply same drop shadow
Move to right side of wreath
Image/free rotate 5.00 right boxes unchecked

10. Select Poinsettia2 (folder 4) in the kit Edit/copy
Edit/paste as new layer above tree Layer
Re-size it 15%, re-size again 85%
Apply same drop shadow
Move to bottom left side of wreath

11. Select winter bells (folder 4) in the kit Edit/copy
Edit/paste as new layer above merged layer
Re-size 15%
Apply same drop shadow
Move to right side of frame

12. Select Stocking (folder 4) in the kit Edit/copy
Edit/paste as new layer into image
Re-size it 25%
Apply same drop shadow
Place on left side of frame

13. Apply Your Text saying now and name if you want to add it

14. Add a new Raster layer apply copyrights, License and watermark.

15. I Re-sized my All layers, smart size to 450x450

ANIMATION
Open Animation Shop now minimize it for now

1. Select the Snow tree Layer
Layers palette right Click add a New raster Layer
Right click layer /Rename snow 1

2. Layers palette right Click snow 1 add a New raster Layer
Right click layer /Rename snow 2

3. Right Click snow layer 2/add a new raster layer
Right click layer /Rename it snow 3

4. Click back on Snow tree Layer
under your selections tab..
A. select all
B. select float
C. Select defloat.
Keep Selected

5. Select Snow 1 Layer
Effects/plugins/Vanderlee snowflakes
Apply settings below
Click eye and close off this layer

7. Click on snow layer 2
Apply Vanderlee snowflakes again
Change random seed to 250
Click ok
Click the eye close this layer

8. Click on Snow layer 3
Apply Vanderlee snowflakes again
Change random seed to 350
Click Ok
Selections/select none

9. Edit/copy/copy Merged
Take it to animation shop
Right click anywhere paste as new animation.

10. Back in PSP click eye close snow layer 3
Open snow layer 2
Edit/copy/copy merged
Take it to animation shop
Paste after frame 1

11. Back in PSP click eye close snow layer 2
Open snow layer 1
Edit/copy/copy merged
Take it to animation shop
Paste after frame 2

12. I did not change display times.
Save your animation now.

Thanks for trying my tutorial I hope you enjoyed it.

If you use my tutorials to make stats place the credit below in your footer
Tutorial By. BabsC
HERE or HERE
Copy and paste credit or use links below
http://groups.yahoo.com/group/sassynsimple/
http://sassynsimple.blogspot.com/

I want to thank the Members of SassynSimple Group for testing the Tutorial
I always appreciate their help in making the tutorials mistake free. 


Tuesday, December 15, 2009

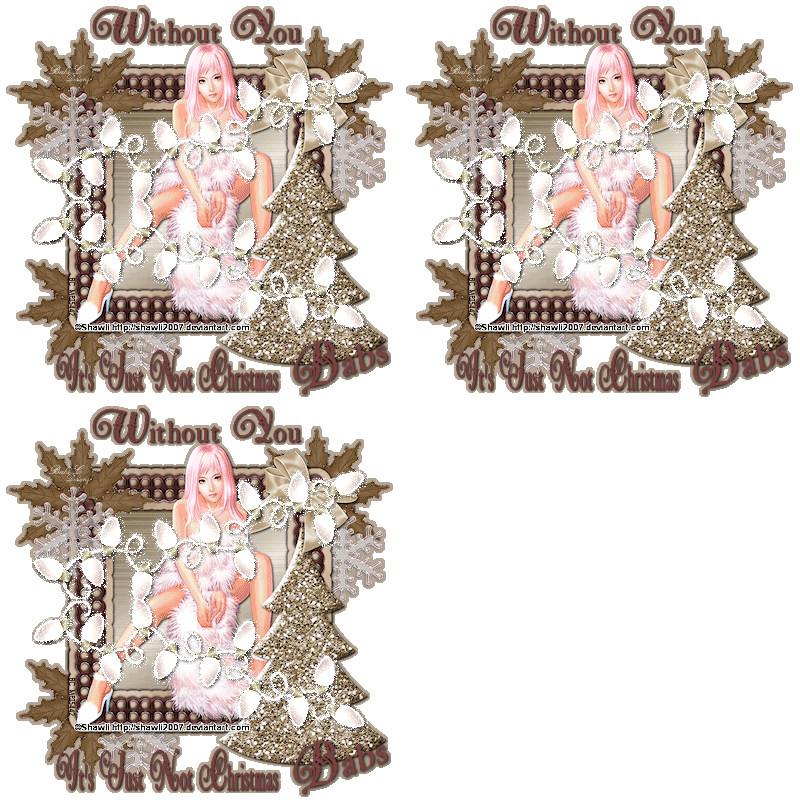
WITHOUT YOU


DATE WRITTEN: 12, 2009
PROGAMS NEEDED
Jasc Paintshop Pro or Corel Paint Program
Animation Shop
PLUGINS: Xenoflex 2 Constellations
You must have a good working knowledge of the programs I use.

ITEMS NEEDED
TUBE: SHAWLI I purchased it at MPT but you can buy it HERE
KIT: Scraps and Tubes Oh Pretty Winter is PTU Tagger Kit HERE
FONT: Of your Choice, I used Vergennes
If you choose a different kit re-sizing may change.

READ BELOW BEFORE STARTING
Settings may differ slightly depending on your version.
Close original after you copy it unless I state otherwise.
Sharpen all re-sized items 1 time.
RE-SIZE only one layer unless other wise stated.
Refer to my image for placement of items.
Left click and right click refers to mouse buttons.

1. Open a new transparent image 700x700 do not fill.

2. Select frame 1 from the kit, Edit/copy,
Edit/paste as new layer into your image.
Under selections do the following.
A. select all,
B. select float.
C. Select defloat.
D modify expand 3

4. Add a new raster Layer under your frame.
Select paper 3 from the kit. Edit/copy,
Edit/paste into selection.
Selections/Select none.

5. Effects/3D/drop shadow
Vertical and horizontal 2
Opacity 70
Blur 5.00
color black
Shadow on new layer not checked
Go Back and apply the drop shadow again
but change the Vertical and horizontal to -2

6. Click back on your frame apply drop shadow.
Change vertical and Horizontal back to 2.
Close off your background Layer,
Layers palette/Right click frame layer/Merge/merge Visible.

7. Select your magic wand click
(settings below) inside the frame window.
Selections/modify/Expand 12.
Add a New raster layer below the merged frame layer.
Select paper 2. Edit/copy,
Edit paste into selection. Selections/Select none.
8. Select your tube, Edit/copy,
Edit/paste as new layer into your image below your frame.
Re-size as needed. I did not re-size
Apply drop shadow
center it in your frame. .

9. Layers palette/right click tube/duplicate 1 time
layers palette drag this layer above your frame.
Use your eraser tool to remove any parts that hide your frame

10. In layers palette click the eye to close the background layer.
Now right click any open layer merge/merge visible.

11. Select the holly from the kit, Edit/copy,
Edit/paste as new layer into your image.
Re-size it 60%.
Apply same drop shadow
Arrange on the top left side of your frame.
You want it slightly under your frame.


12. Layers palette/right click Duplicate the holly layer 1 time,
Image/mirror.
In your layers palette Drag this layer below your merged layer.
Click back on the holly
Layers palette/right click Duplicate it 1 time
Image/flip
drag this below your merged layer

13. Select snowflake 2 from the kit Edit/copy,
Edit/paste as new layer into your image.
Re-size it 70%.
Apply drop shadow, but change the color to dark gray.
Arrange on the top left side below your holly.

14. Layers palette/right click Duplicate the snowflake 1 time
Image/mirror
drag it below you frame layer.
Click back on the snowflake on the left duplicate it 1 time
Image/flip move it to the right side of your holly.
Drag it down under your frame.

15. Select bow 1 from the kit. Edit/copy
Edit/paste as new layer into your image
Re-size it 50%.
Image/mirror.
Apply same drop shadow
Place on right top corner

16. Select the x-mas tree from the kit, Edit/copy
Edit/paste as new layer into your image.
Re-size it 65%.
Apply drop shadow change color back to black
Move it to the right side of your frame

17. Select #7c3f3f color in your
foreground background color.

18. Select your text tool (settings below)
Type our your top saying. Size it with your nodes.
Place it at the top. Covert it to a raster layer.
Apply same drop shadow color black.
Now do the same for your bottom saying.


19. Add your water marks and copy rights.
layers palette right click any layer merge/merge visible.
Re-size all layers/smart size to 400 width height will adjust.

20. Select the Christmas lights from the kit.
Edit/paste as new layer into your image.
Re-size 45%. Apply drop shadow.
Move it to the top some. Refer to my image.
Layers palette/right click Duplicate 1 time
Image/flip.
Right click duplicate in layers palette merge/merge down.


21. Now duplicate your Lights layer 1 time.
In layers palette close off the duplicate.

22. Merge Visible. Under selections do the following.
A. select all,
B. select float.
C. Select defloat.
D modify expand 3

23. Using your dropper tool select the tan color from your frame.
Click on your background layer (make sure to open if closed).
Flood fill the selection.
Selections/select none.
Right Click your merged image in layers palette merge/merge down.
You should now have 2 layers.
Your merged image and the closed Lights layer your duplicated.


24. Now open back up the duplicate copy of your lights.
duplicate this layer 2 times.
You should now have 3 lights layer.


ANIMATION
Open your animation shop and minimize for now. I will call it AS
1. Staring with your Top Light Lights Layer
Effects/Plugins/Xenoflex2 Constellations
(settings below)
Click ok.
Close off this layer by clicking eye in layers palette.


2. Select the middle Light layer.
Apply the Xenoflex2 constellations again
click random seed one time
click ok.
Close off this layer.


3. Select the bottom Lights layer.
Apply the Xenoflex2 constellations again
click random seed one time
click ok.


4. Edit/copy Merged.
Take it to AS right click anywhere in the workspace
paste as new animation.


5. Back in PSP close off your bottom lights layer.
Open the middle lights layer.
Edit/copy Merged.
Take it to AS.
Right click first frame paste/paste after current layer.


6. Back in PSP close off your middle lights layer.
Open the top lights layer.
Edit/copy Merged.
Take it to AS.
Right click first frame paste/paste after current layer.


7. Now save your animation. I did not change the display time.

I hope you enjoyed this tutorial.

Using my Tutorials to make your Stationary?
Please place a credit like below in your footer

Tutorial by Babs C
HERE or HERE
Link back to the links below please
http://sassynsimpletagtuts.blogspot.com/
http://groups.yahoo.com/group/sassynsimple/

I want to thank all the testers for testing my tutorials
I appreciate their help so much.

©Sassy n Simple